Download and Install the Operating System
The K1 Pro comes pre-installed with a system image. If you do not need to flash a new image, you can skip this chapter.
Flashing the Image to eMMC
Image Download Link:
Username and Password
| Username | Password |
|---|---|
| bitbrick | temppwd |
Tools Download and Installation
Flashing the image to eMMC requires the RKDevTool flashing tool and the DriverAssitant driver.
Note: RK3576 series must use RKDevTool version v3.30 or above.
Installing DriverAssitant
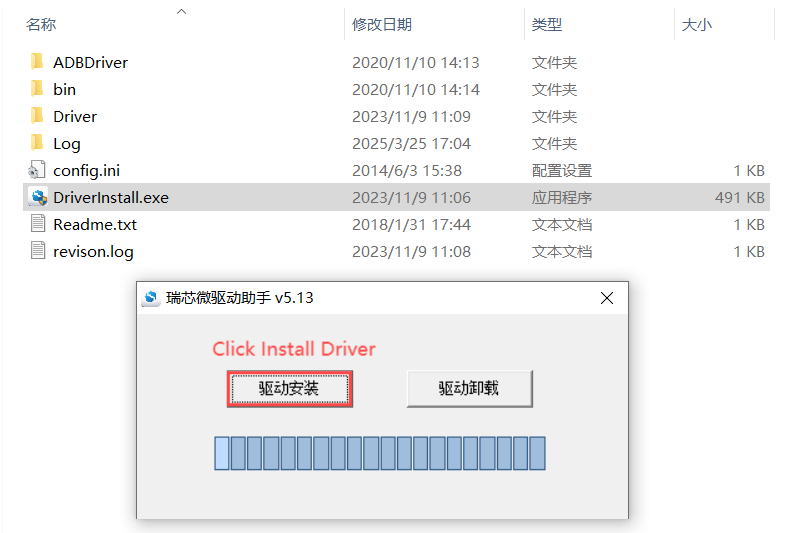
- Extract the DriverAssitant software package and double-click DriverInstall.exe to enter the driver installation interface.
- Click "Install Driver" to start the installation. If you are unsure whether an older version of the driver is installed, click "Uninstall Driver" first to remove the old version, then click "Install Driver."
Installing RKDevTool
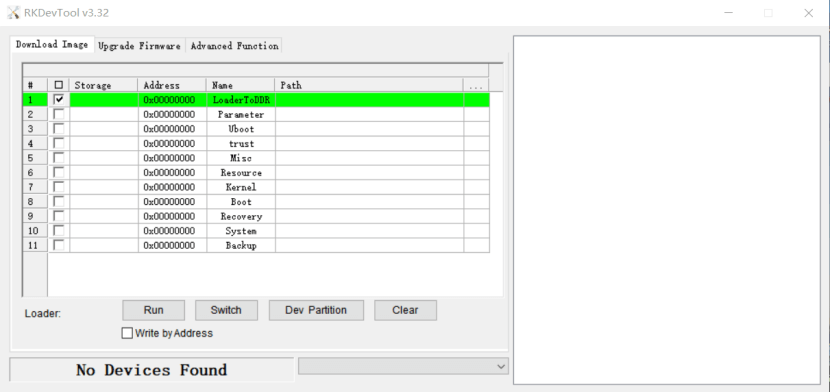
RKDevTool is a dedicated USB flashing tool for Rockchip, available on Windows. It uses a USB interface to download the system image to the board.
- After extracting the package, the tool can be used without installation. Double-click RKDevTool.exe to enter the software interface.
- The software has three main sections: Download Image, Upgrade Firmware, and Advanced Features.
Flashing the Image in Loader Mode
Open the RKDevTool flashing tool and set the board to flashing mode.
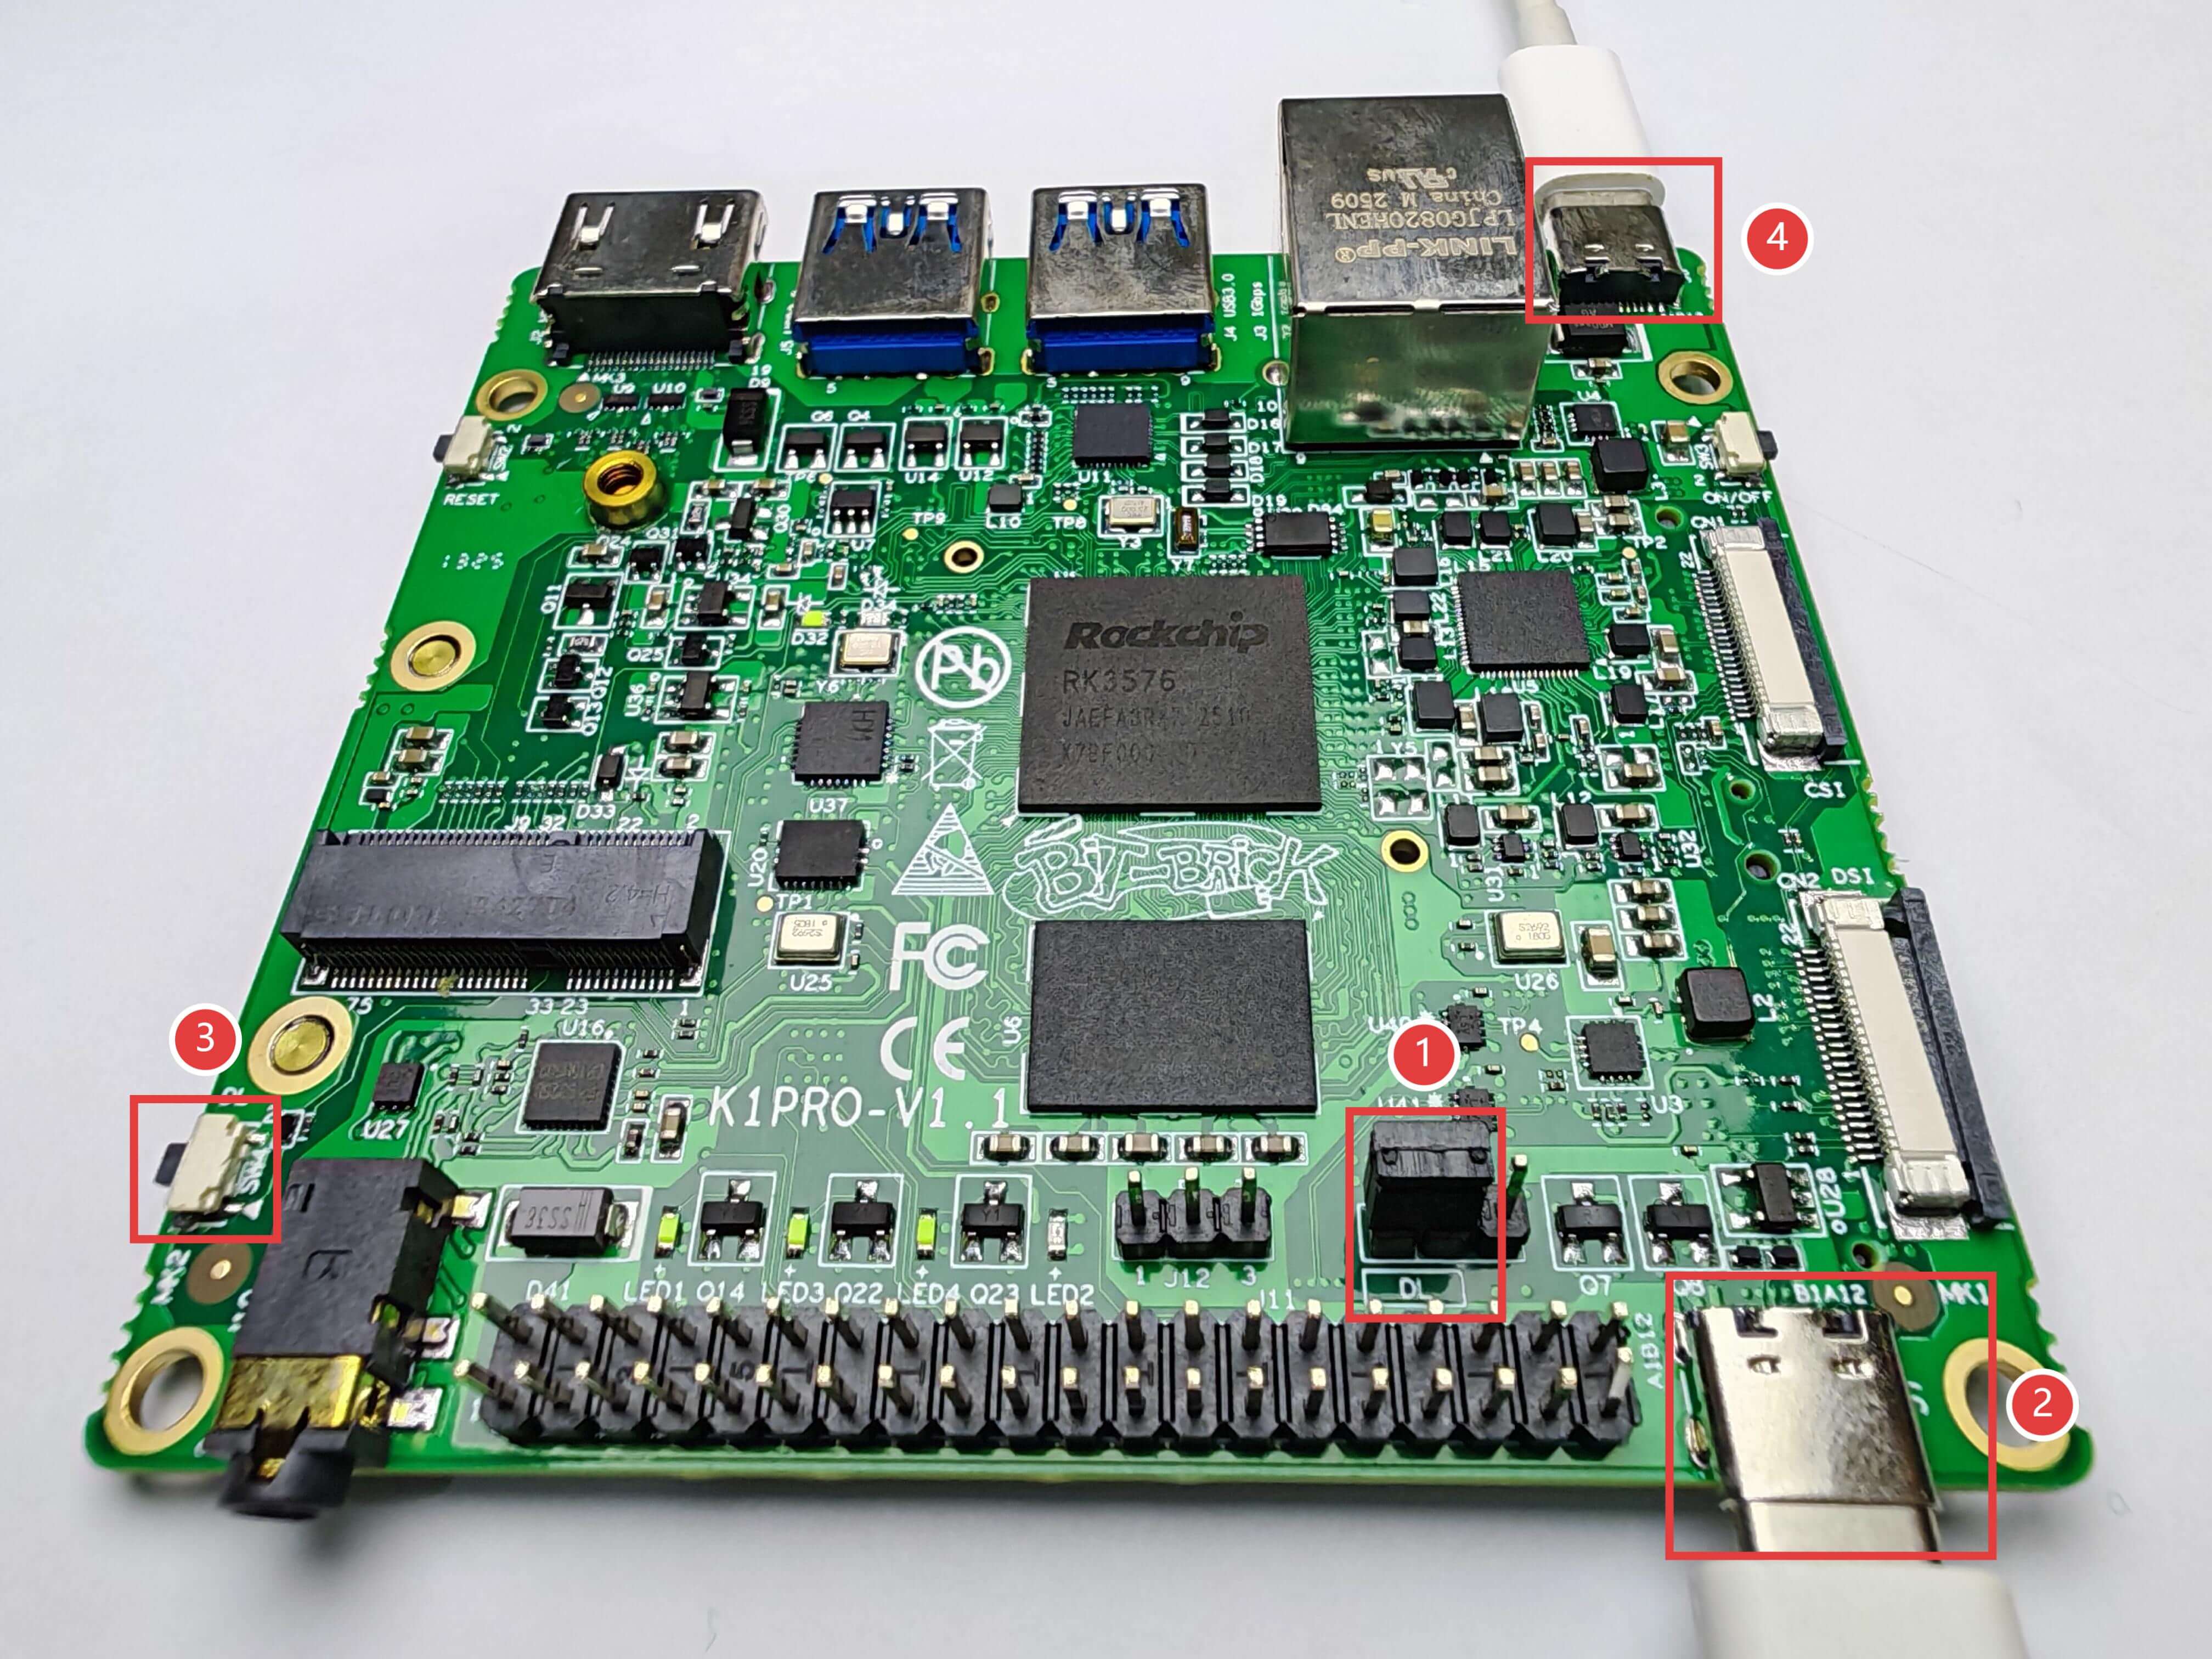
- Prepare a Type-C cable and a power cable. The Type-C cable is used for image flashing
- Use a jumper cap to short-circuit the pins marked as
DL(shown as 1 in the image) to enter firmware download mode - Connect one end of the Type-C cable to the board's OTG port, hold down the K1 Pro's Download button, then connect the power supply to K1 Pro to enter Loader mode
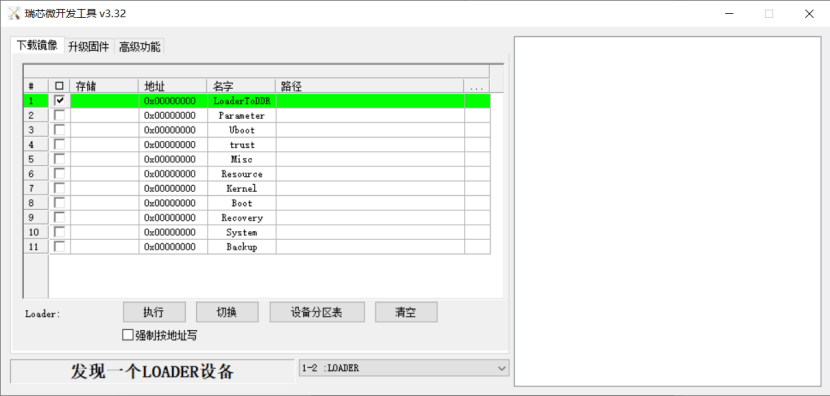
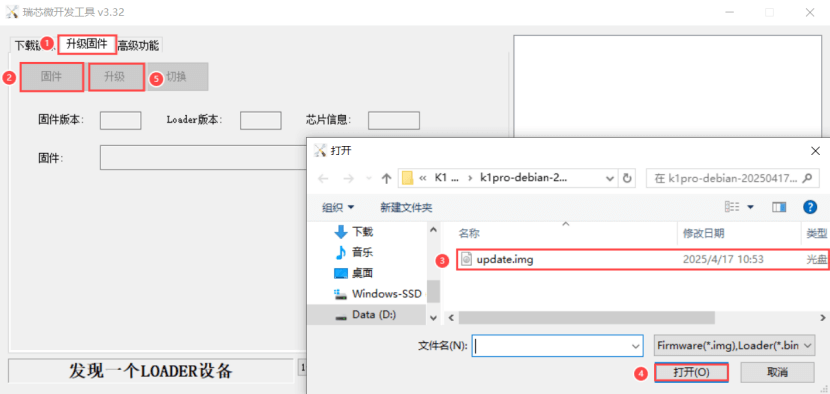
Click "Upgrade Firmware", select the image to be flashed, then click "Upgrade" to start flashing the firmware
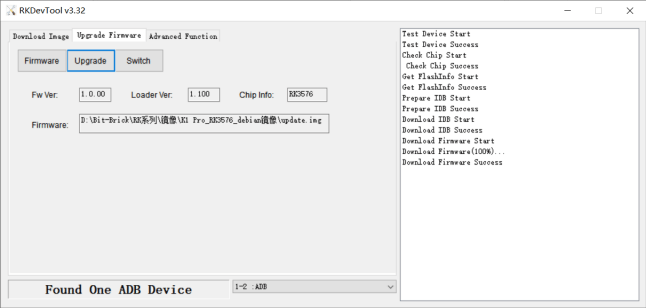
The image is successfully flashed, as shown below:
After programming is complete, remove the jumper from the “DL” position; otherwise, the USB port will not supply power.
Flashing the Image in MASKROM Mode
[Flashing process description]
Flashing the Image to an SD Card
Flashing the image to an SD card requires dedicated flashing software and a card reader.
Installing SDDiskTool
Flashing the image to an SD card requires the SD_Firmware_Tool.exe flashing tool and the SDCardFormatter formatting tool.
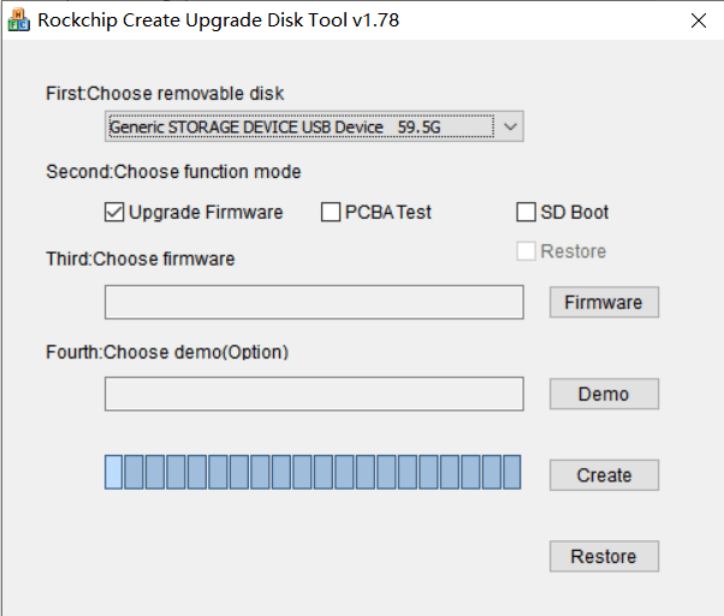
Note: RK3576 must use SDDiskTool version v1.78 or above.
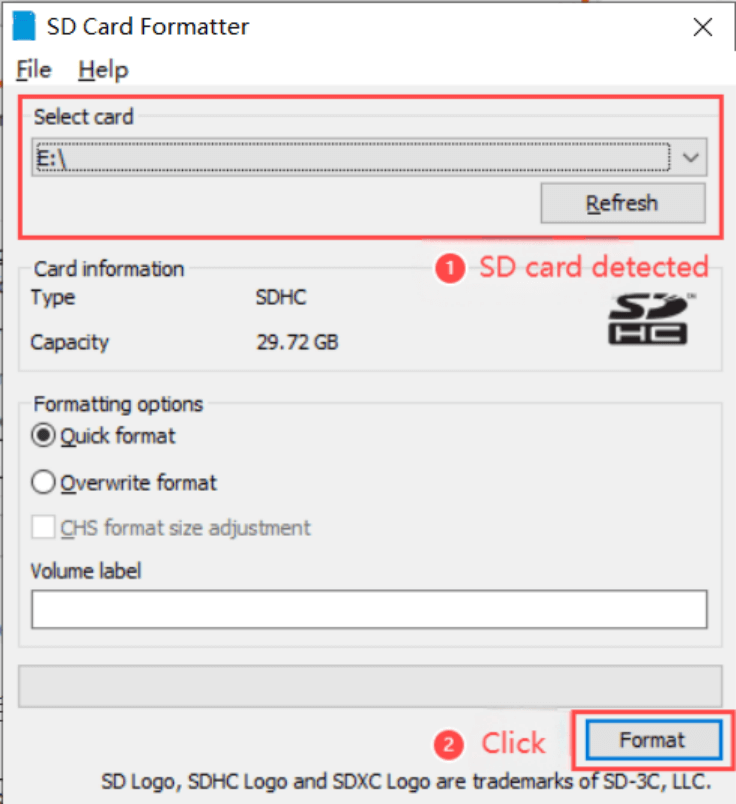
- After installing SDCardFormatter, open the software. Once the SD card is detected, click "Format." If the card is not detected, use the built-in Windows formatting tool first, then use this tool.
- Extract the SD_Firmware_Tool package. The tool can be used without installation. Double-click to enter the software interface.
Flashing the Image
Open the executable file SD_Firmware_Tool.exe and insert the SD card.
- First, select the correct SD card to be flashed. Then set the function mode to "SD Boot," select the image to be flashed, and finally click "Start" to create and flash the image to the SD card.
- Wait patiently for the SD card to finish flashing. Larger images will take longer to flash.
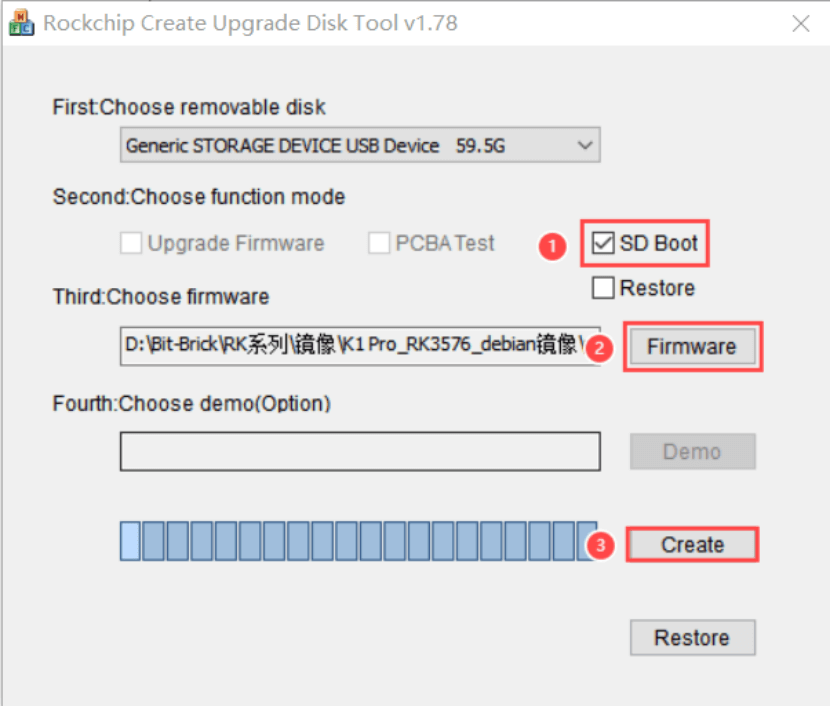
Note: There is a chance of an error message saying the flashing failed when clicking "Start." Close the error window and try again.
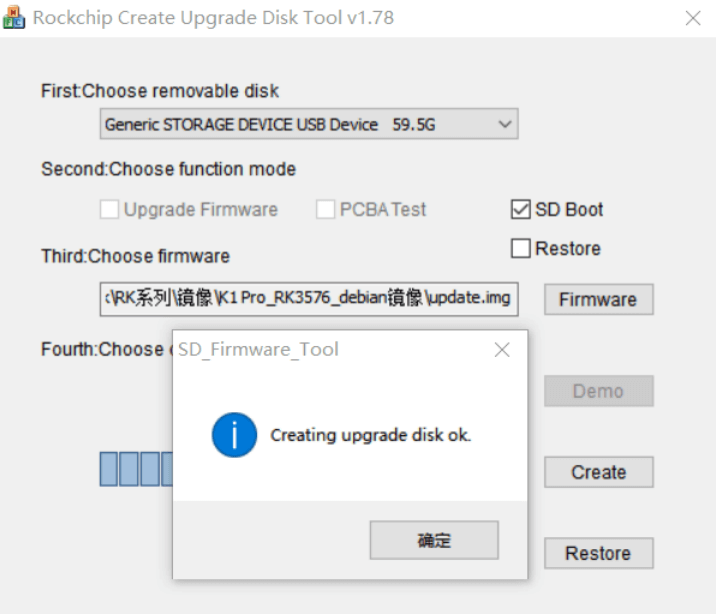
Flashing is successful, as shown below:
FAQs
Q1: What is the difference between MASKROM mode flashing and Loader mode flashing?
A1: The principle of Loader mode flashing is that the board detects a pin being pressed during the uboot startup phase and then enters flashing mode. Loader mode flashing requires the image to be intact (mostly used in Android mode). MASKROM mode flashing occurs when the chip detects the pin being pressed during startup and then enters flashing mode. MASKROM mode flashing is suitable for most scenarios.

