
K1 OH5.0 AI 构建开发说明
修订记录
| 修订版本 | 修订日期 | 修订说明 |
| 001 | 2025-03-28 | 初始版本 |
| 002 | 2025-04-12 | 优化格式 |
1. 前置准备
参考编译文档完成系统编译、烧录:K1 OH5.0 下载编译烧录说明
1.1 Ollama + Deepseek 资源准备
下载地址:点我下载
deepseek-r1-distill-qwen-1.5b-q4_0.gguf
Modelfile
Ollama
deepSeek-r1-distill-qwen-1.5b**-q4_0.gguf**
已压缩与优化的大语言模型文件,采用 GGUF 格式。该格式针对高效推理与模型压缩设计,适合在资源受限的设备(如嵌入式或移动终端)上运行。
M****odefile
定义了如何配置和使用 deepseek-r1-distill-qwen-1.5b-q4_0.gguf 模型文件。
O****llama
运行和管理各种机器学习模型。它支持多个模型版本和格式,包括 DeepSeek 系列模型。通过 Ollama,你可以方便地部署、运行和管理 DeepSeek-R1-Distill-Qwen-1.5B-Q4_0.gguf 模型。
1.2 环境和工具准备
- MUSE Paper 及电源一套
- Type-C 线(用于烧录和 hdc 连接)
- Windows 系统端安装 hdc 工具(用于和板子之间传输文件)
- IDE(DevEco 4.0)
- K1 OH5.0 编译构建环境
2. 安装 Ollama + deepseek-r1-1.5b
为了让开发者快速体验,提供了一键打包安装的安装包。
2.1 连接设备
用 Type-C 线连接 Windows 系统和 Muse Paper
确认 hdc shell 正常连接 MUSE Paper
D:\>hdc list targets
0123456789ABCDEF
2.2 下载并解压安装包
将安装包下载至 Windows 电脑任意目录并解压。下载地址:点我下载(若已下载,请忽略)。
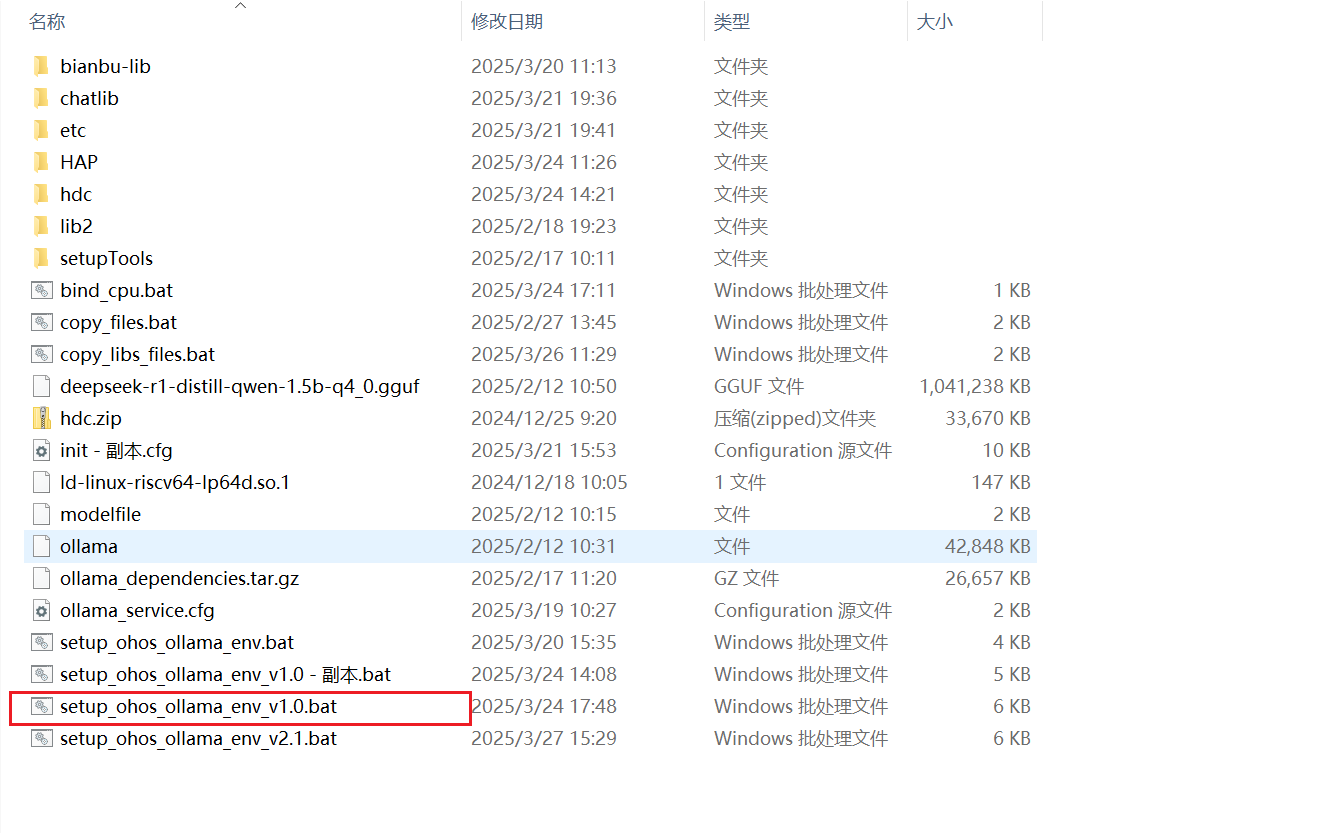
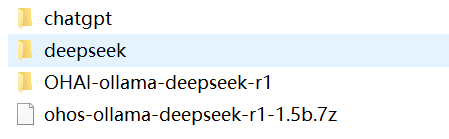
安装包内包含:安装包、二次开发所需要的程序和开发手册等。
2.2.1. 一键自动安装 Deepseek
双击图中的红色圈住的安装脚本:setup_ohos_ollama_env_v1.0.bat , 系统将自动为 OH 安装所有 LLM 的依赖库和应用程序:
2.2.2. 运行调试
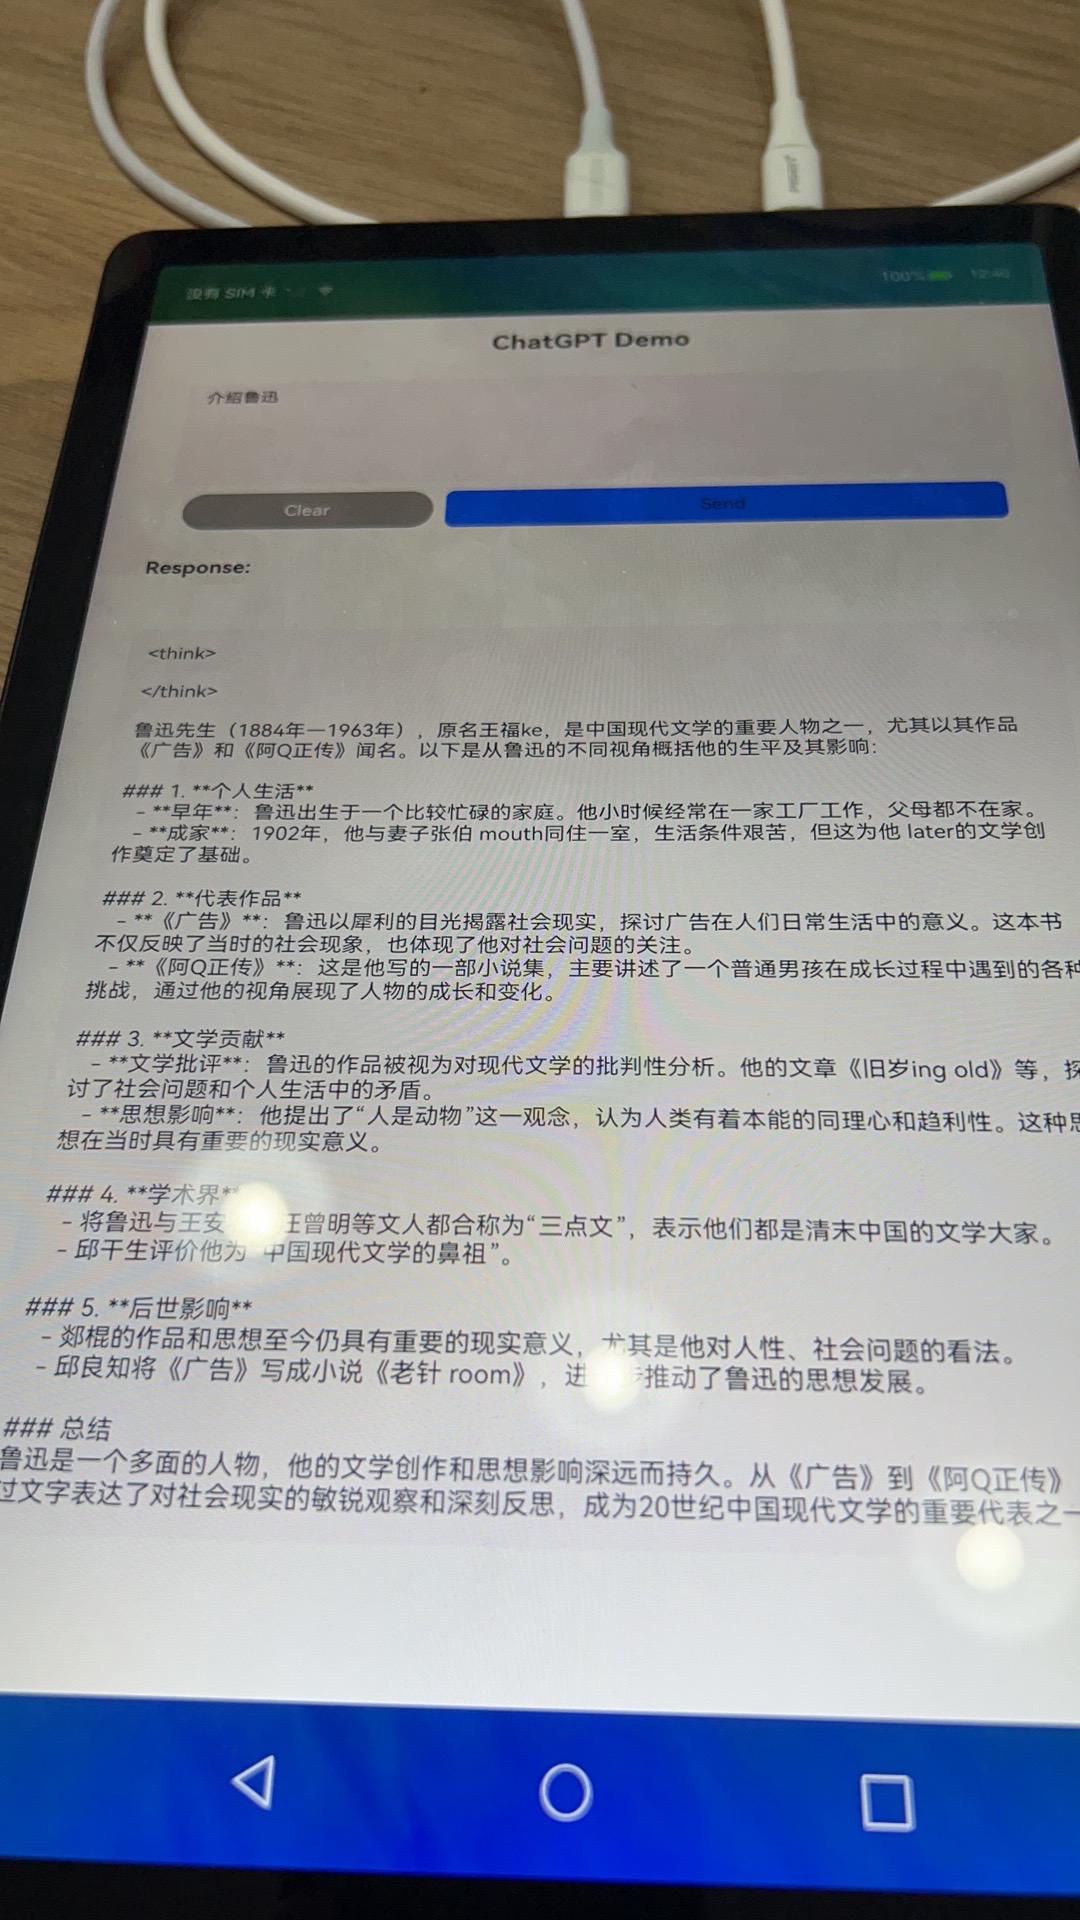
安装完后,应用就可以进行 LLM 的问答功能。
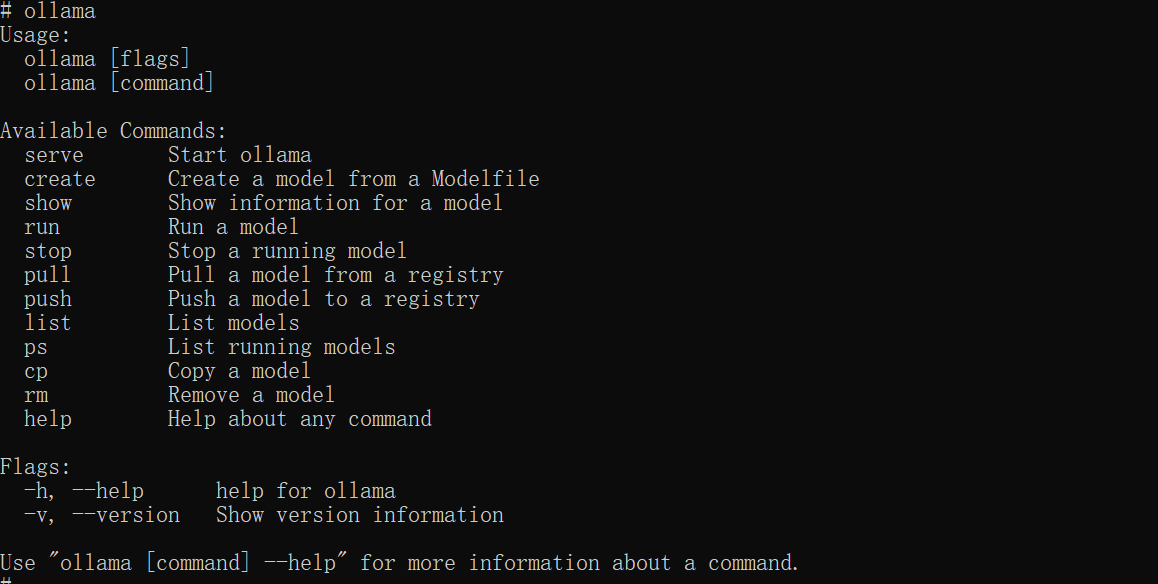
- 运行 Ollama,显示如下图表示 Ollama 正常工作:
- 如下图,若
list为空,表示模型没有安装,需要加载大模型

- 加载大模型
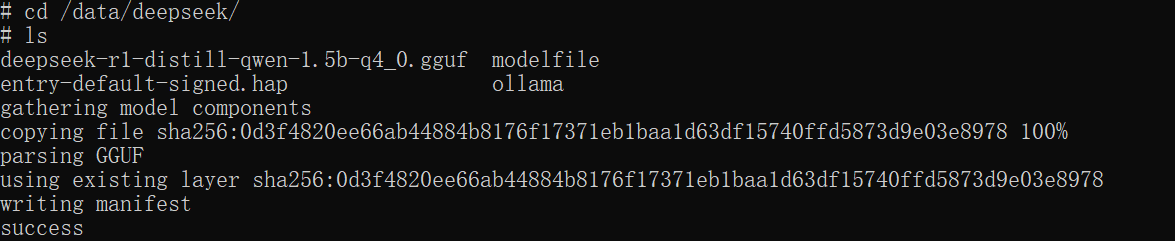
- 再查看模型列表

- 在命令行运行大模型进行对话

- 打开 OH 的 HAP 程序
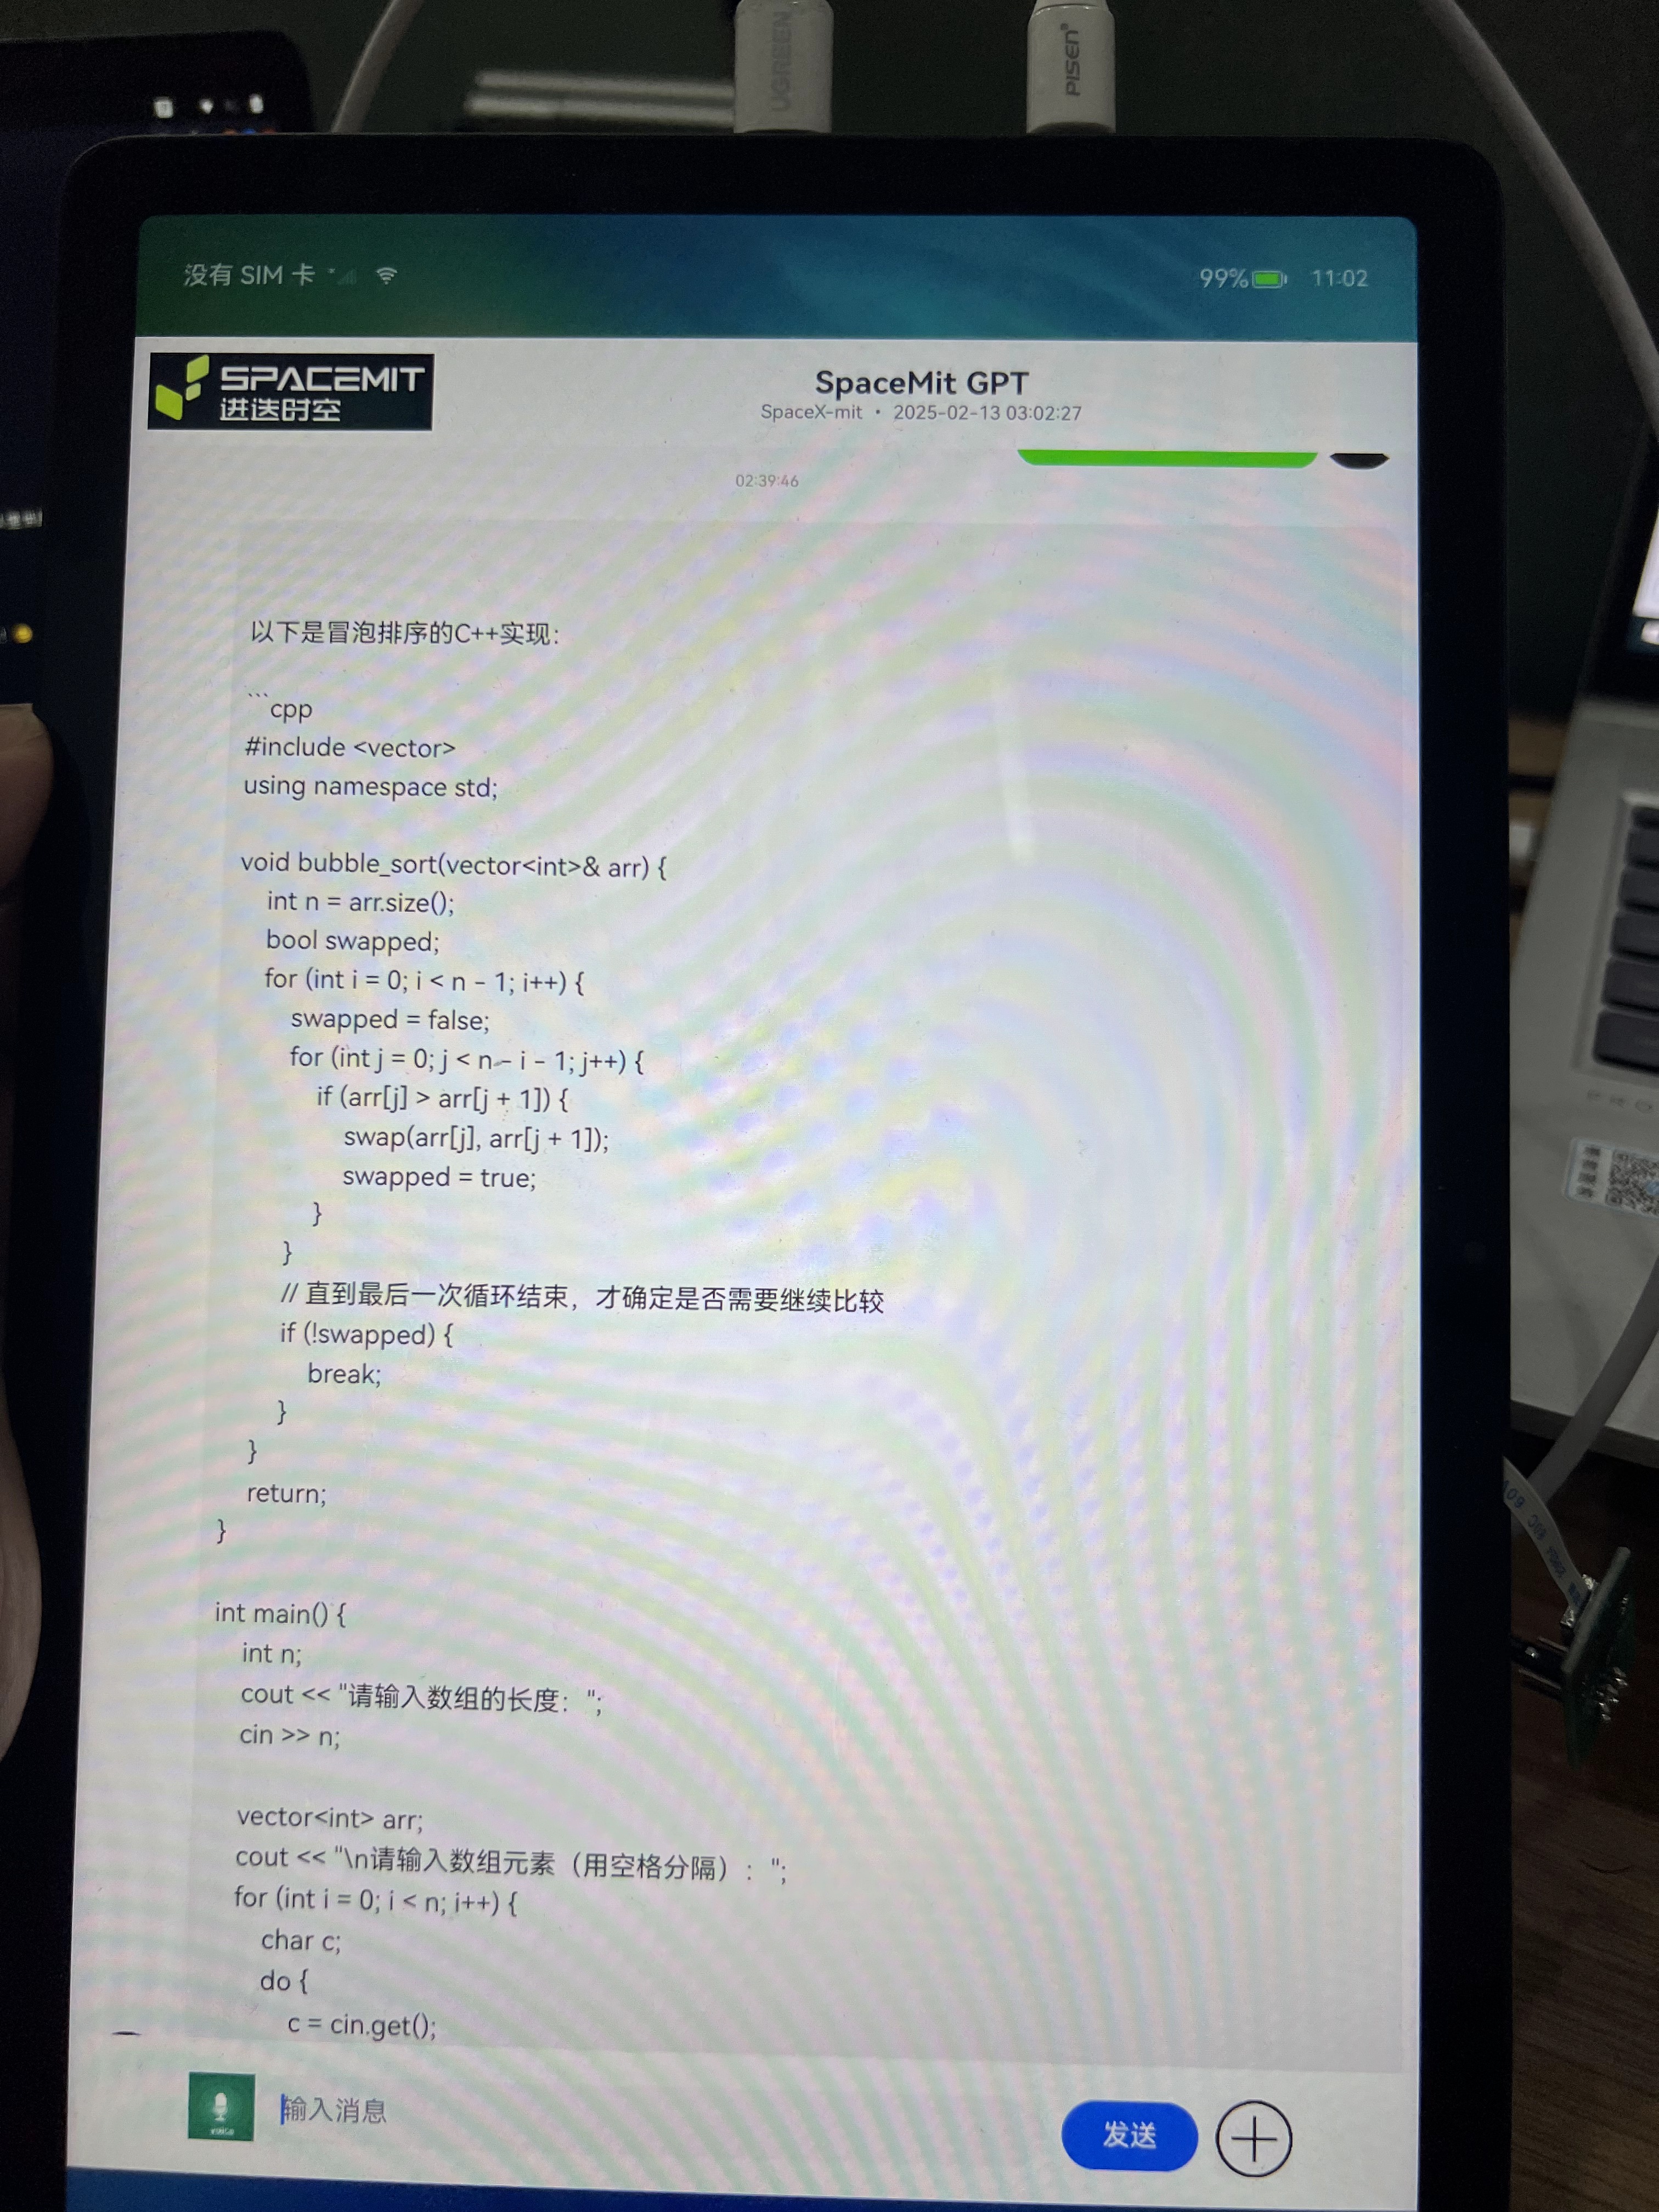
- 测试 HAP 的使用界面
3. 二次开发
3.1 开发环境准备
-
OH 系统开发:VSCode + Ubuntu Linux server
-
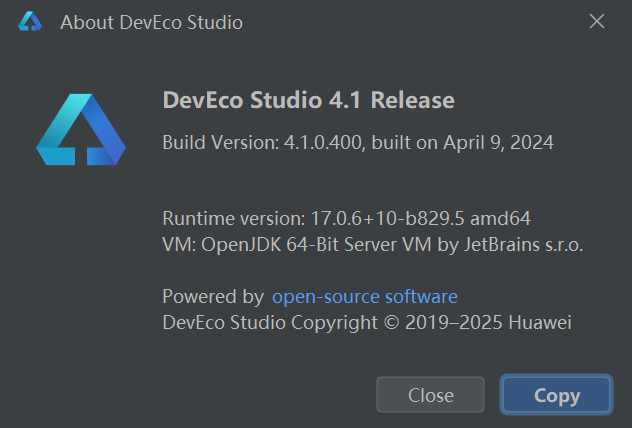
HAP 开发:DevEco 4.0 (推荐版本:
deveco-studio-4.1.0.400.exe) -
需要开发文件:点我下载(若已下载,请忽略)
c``hatgpt: 包含 OH ChatGPT 库代码与 TestNAPI 测试代码d``eepseek:演示 HAP 代码
3.2. OH 系统构建
- 将
chatgpt文件夹放入路径:oh5.0/foundation/communication/chatgpt - 配置模块编译文件后,即可生成对应库文件,为上层 HAP 提供访问 Ollama 接口的支持
3.2.1. 编辑开发代码
根据实际需求修改源代码。
3.2.2. 编译镜像
执行以下命令进行系统构建:
./build.sh --product-name musepaper2 --ccache --prebuilt-sdk
与本工程相关的两个库为:
libchatgpt_napi.z.solibchatgpt_core.z.so
新编译的镜像包含这两个 so,可以烧录镜像,也可以用 hdc file send 命令推送进去,如下:
hdc file send libchatgpt_napi.z.so /lib64/module/
hdc file send libchatgpt_core.z.so /lib64/
3.3. HAP 测试工程
OH5.0\foundation\communication\chatgpt\testNapi 目录主要用于为二次开发者提供参考示例,以便其基于该工程开发自定义的 AI 大模型应用。使用指定版本的 DevEco Studio 打开并编译该工程,可生成��测试用的 testNapi HAP 文件,用于验证功能及辅助后续 LLM 应用开发。

3.4 开发调试
3.4.1 查看日志
-
hdc shell higlog | grep Chatgpt -
hdc shell hilog | grep Index -
设置 Ollama debug:
export OLLAMA_DEBUG=1//可输出日志e``xport OLLAMA_HOST='0.0.0.0'//可外部访问 OLLAMA
02-28 12:35:58.260  4086  4086 I C01650/ChatGPT: ChatGPT instance created
02-28 12:35:58.260  4086  4086 I C01650/ChatGPT: Generating streaming response for input: who are you
02-28 12:35:58.261  4086  7595 I C01650/ChatGPT: Request payload: {"model":"deepseek-r1-1.5b","prompt":"who are you","stream":true}
02-28 12:35:58.262  4086  7595 I C01650/ChatGPT: Making request to Ollama API at [http://localhost:11434/api/generate](http://localhost:11434/api/generate)
02-28 12:35:58.266  4086  7595 I C01650/ChatGPT: CURL request completed after 1 attempts
02-28 12:35:58.267  4086  7595 I C01650/ChatGPT: Request completed successfully
3.5 演示 HAP 工程
同样使用 DevEco Studio 4.1 Release 打开对应代码工程,编译演示 HAP。
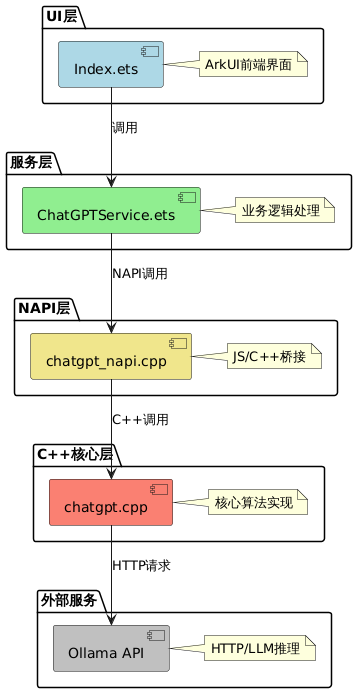
4. OH + Ollama + Deepseek 设计说明
4.1. 架构
-
前端层(ArkTS)
- 界面和业务
-
服务层 (ArkTS)
- 跨 NAPI 回调实现 (ArkTS ↔ OS Native)
- 回调注册和管理
- 业务逻辑、API 交互和数据处理
-
NAPI 层
- JavaScript/TypeScript 与 C++ 的接口
- 参数解析和传递
- 回调注册
-
C++ 实现层
- 核心功能及本地 API 交互
napi_async_work实现(防止主线程阻塞 导致 app 主线工作线程发生 block crash);- 实现跨 napi 的 callback( arkts <---> os native )
- Ollama 集成
- DeepSeek 集成
4.2. LLM(chatgpt) 子系统部件 设计&实现
-
ChatGPTService 使用单例
-
C++ ChatGPT 类使用单例
-
异步处理
- NAPI 层使用
napi_async_work - C++ 层使用
std::thread - 智能指针防止内存泄漏,增加健壮性,替代
new - UI 层使用实时回调
- 流式 stream 处理
- 详细日志跟踪
- NAPI 层使用
4.2.1 调用流程
- 用户在 UI 输入文本 → 触发
onClick事件 ChatGPTService调用 NAPI 模块的generateResponse- NAPI 层转换参数,创建异步工作
- C++ 层执行 HTTP 请求,通过回调返回结果
- 结果通过回调链传回前端显示,前端实时渲染
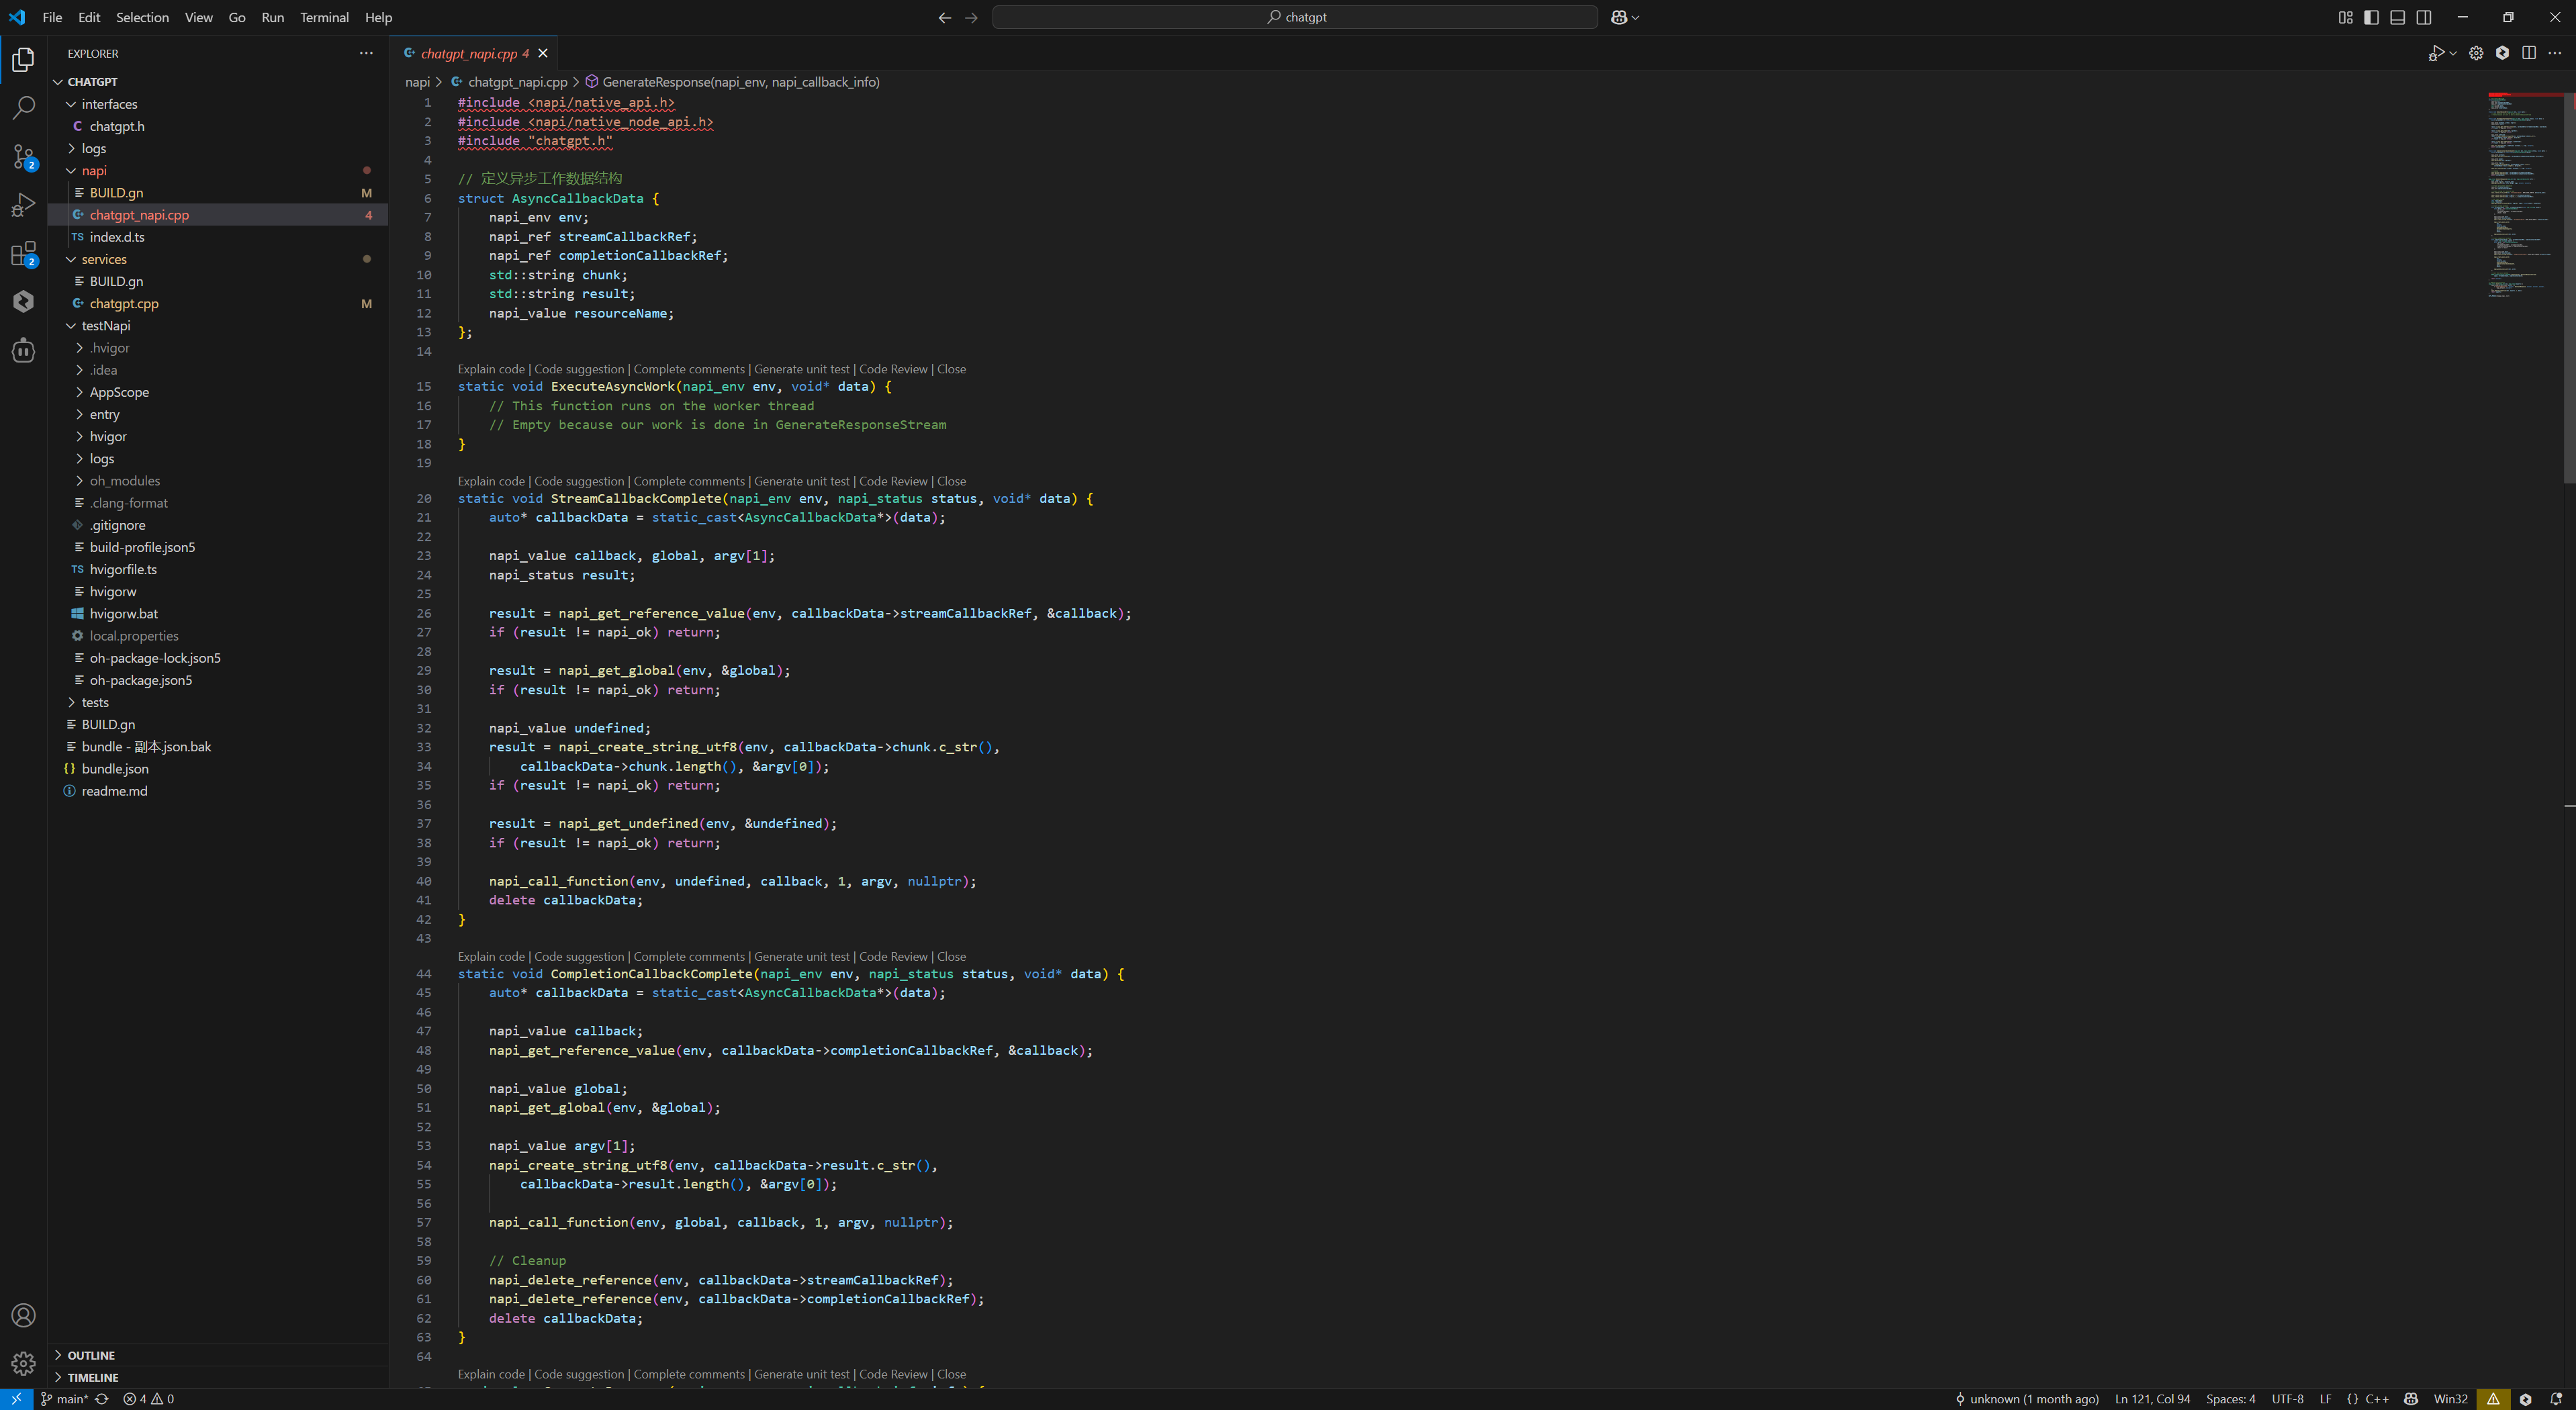
4.2.2. chatgpt_napi.cpp 设计
数据结构:
struct AsyncCallbackData {
    napi_env env;                    // NAPI 环境
    napi_ref streamCallbackRef;      // 流式回调引用
    napi_ref completionCallbackRef;  // 完成回调引用
    std::string chunk;               // 数据块
    std::string result;              // 结果
    napi_value resourceName;         // 资源名称
};
回调处理
-
StreamCallbackComplete:处理流式数据回调,当有数据 chunk 出现进行处理- 获取回调函数引用
- 创建参数数组
- 调用 JavaScript 回调函数
- 清理资源
-
CompletionCallbackComplete:处理完成回调,当处理完成回调处理- 类似流式回调的处理流程
- 额外清理所有回调引用
主要接口函数
napi_value GenerateResponse(napi_env env, napi_callback_info info) {
    // 获取参数
    // 创建回调引用
    // 设置异步工作
    // 调用本地方法
}
模块初始化
napi_value Init(napi_env env, napi_value exports) {
    // 注册模块方法
    napi_property_descriptor desc[] = {
        { "generateResponse", nullptr, GenerateResponse, nullptr, nullptr, nullptr,
            napi_default, nullptr }
    };
    napi_define_properties(env, exports, 1, desc);
    return exports;
}

NAPI_MODULE(chatgpt_napi, Init)
代码流程:
- 模块初始化
NAPI_MODULE(chatgpt_napi, Init)  // 注册模块
↓
Init(napi_env env, napi_value exports)  // 初始化函数
↓
napi_define_properties  // 注册 generateResponse 方法

**ChatGPT初始化:**
ChatGPT::ChatGPT()
↓
std::call_once(initFlag, [this]() {
    InitializeCurl()  // CURL 全局初始化
})
UI 层触发:
// Index.ets 中的点击事件
this.chatGPTService.generateResponseStream(
    this.userInput,
    (chunk: string) => { this.response += chunk },
    (result: string) => { this.isLoading = false }
)
- 服务层处理:
// ChatGPTService.ets
public generateResponseStream(input: string, streamCallback, completionCallback): void {
    this.nativeChatGPT.generateResponse(input, streamCallback, completionCallback)
}
- NAPI 层转换:
// chatgpt_napi.cpp
napi_value GenerateResponse(napi_env env, napi_callback_info info) {
    // 参数转换
    // 创建异步工作
    OHOS::Communication::ChatGPT::GetInstance().GenerateResponseStream(
        input, streamCallback, completionCallback);
}
- C++ 核心实现:
// chatgpt.cpp
void ChatGPT::GenerateResponseStream(
    const std::string& input,
    StreamCallback streamCallback,
    CompletionCallback completionCallback) {
    // 执行 HTTP 请求
    // 处理流式响应
}
5. FAQ
5.1. 保证推理 CPU 资源不被强占,需要绑定消耗 CPU 的几个进程
taskset -p 240 $(pidof render_service)
taskset -p 240 $(pidof com.example.deepseek)
taskset -p 240 $(pidof com.example.testnapi)

参数说明:
240 (十六进制0xf0 , 二进制 11110000) 表示 CPU 4-7
命令说明:
taskset -p 240 $(pidof render_service)
pidof render_service: 找到对应线程的线程ID(PID)
taskset -p 240 [PID] 绑定进程运行的CPU 240(二进制表示:11110000)

如果要产品化可以调用 sched_setaffinity() 函数来设置CPU的绑定
int sched_setaffinity(pid_t pid, size_t cpusetsize, const cpu_set_t *mask);
5.2. 如何导出 Ollama 日志

5.3. MUSE Paper 经常熄屏
设置屏幕不熄屏
power-shell setmode 602
5.4. Ollama 无法运行
可能缺少了 ld-linux-riscv64-lp64d.so.1
/lib/ld-linux-riscv64-lp64d.so.1

把这个文件拷贝的ohos的对应目录, 赋予执行权限 _chmod +x /lib/ld-linux-riscv64-lp64d.so.1_
5.5. 空间不够

解决方法: 把这个 /.ollama 目录链接到 /data/deepseek/.ollama
ln -s /data/deepseek/.ollama /.ollama
5.6. Windows 命令行下面法输入中文和显示中文调试
设置CMD支持中文<: 在windows console 执行>
  让CMD Console支持中文输入与显示:
  chcp 65001:

chcp 是 “Change Code Page” 的缩写,用于更改当前控制台的代码页。65001 代表 UTF - 8 编码。
执行此命令后,CMD 窗口会切换到 UTF - 8 编码,此时就能正常显示和输入中文了。