Download and Install the Operating System
After preparing all the necessary items, we can proceed to download and install the operating system.
1. Download the Operating System
Bianbu Operating System
Bianbu OS is the default operating system for BIT-BRICK K1. It is a RISC-V optimized operating system compiled from Ubuntu community source code.
Firmware download links:
- Files ending with img.zip are SDcard firmware, which can be written to SDcard using dd command or balenaEtcher after extraction. Note that this firmware is not suitable for eMMC.
- Files ending with .zip can be flashed using Titan Flasher, or using fastboot after extraction.
The root user password for the firmware is: bianbu.
2. Install the Operating System
PC Requirements
Operating System: Windows or Linux or MacOS C drive space (or Linux/MacOS Home space): > 5GB
- SDCard
- EMMC
We will use the balenaEtcher tool to flash the firmware to the Micro SD card.
Install balenaEtcher
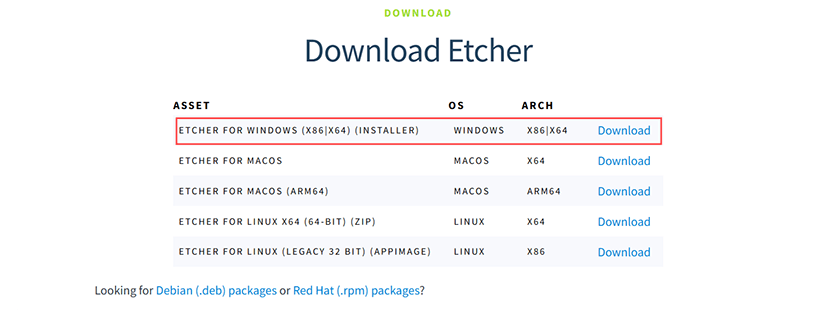
- Windows
- Linux
-
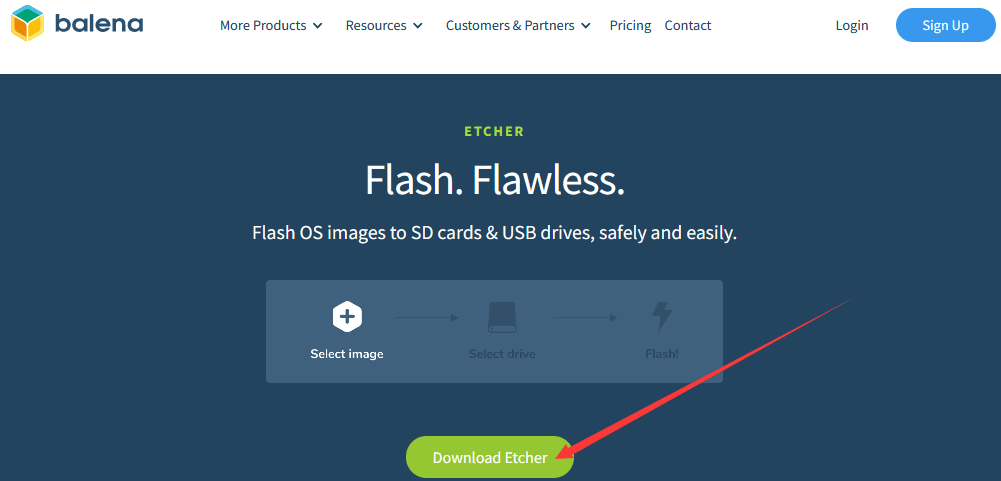
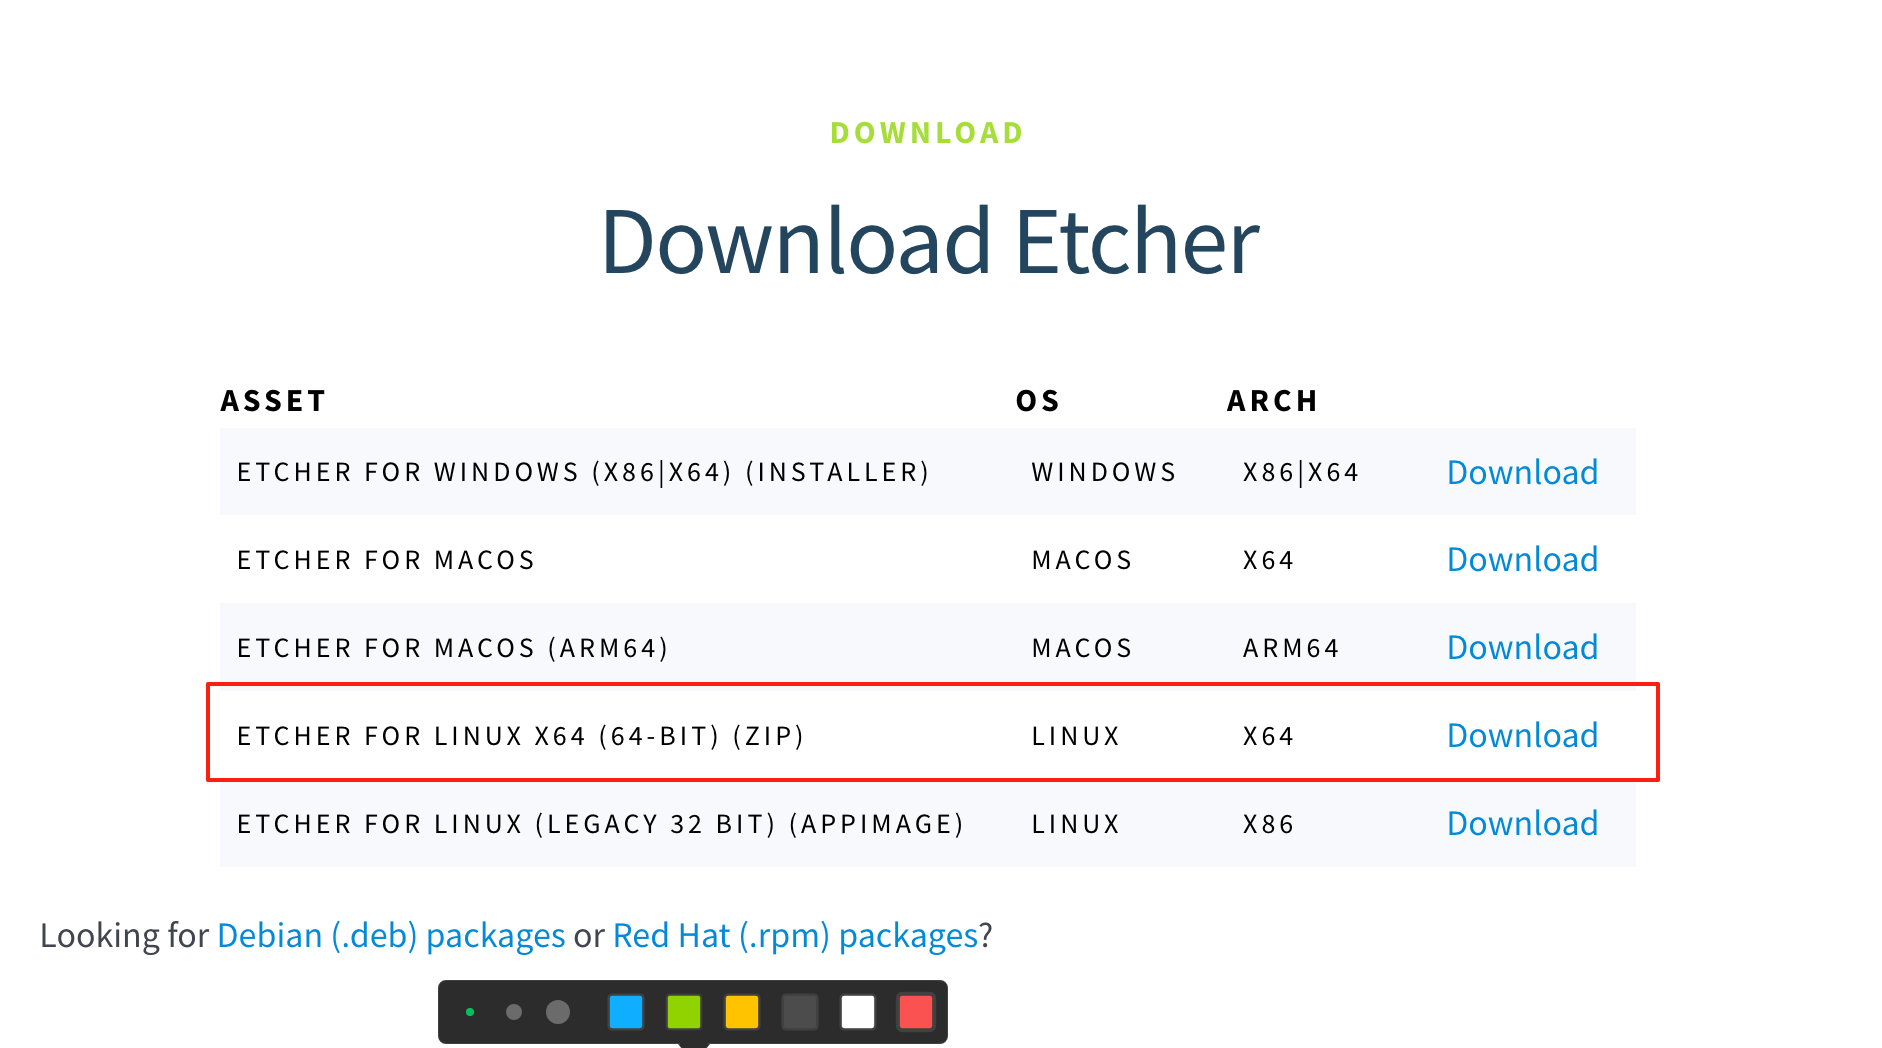
Download the Linux image flashing tool—balenaEtcher from: https://www.balena.io/etcher/
-
After entering the balenaEtcher download page, click the green download button to go to the software download section
- You can choose to download the Portable version of balenaEtcher, which doesn't require installation and can be used by double-clicking
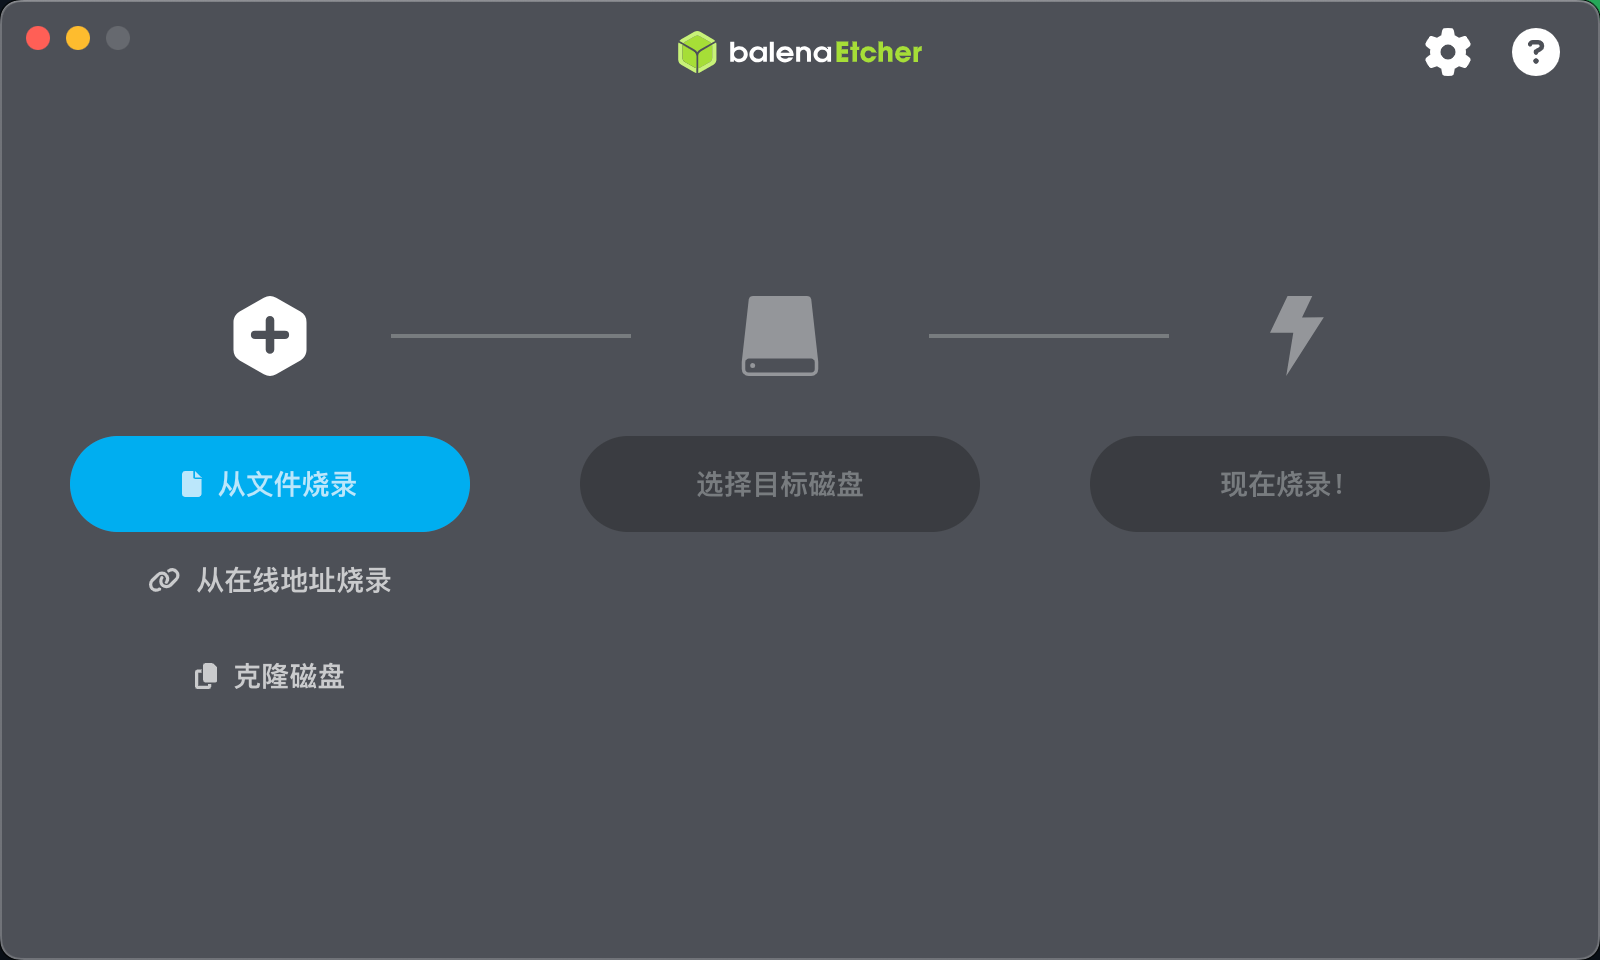
- If you downloaded the installation version of balenaEtcher, please install it before use. If you downloaded the Portable version, simply double-click to open it. The balenaEtcher interface after opening looks like this:
-
Download the Linux image flashing tool—balenaEtcher from: https://www.balena.io/etcher/
-
After entering the balenaEtcher download page, click the green download button to go to the software download section
- You can choose to download the Portable version of balenaEtcher, which doesn't require installation and can be used by double-clicking
- Then double-click balenaEtcher-1.14.3-x64.AppImage in Ubuntu PC's graphical interface to open balenaEtcher (no installation needed). The balenaEtcher interface after opening looks like this:
Using balenaEtcher to Flash the Image
-
First, prepare a 16GB or larger TF card. The transfer speed must be class10 or above. We recommend using branded TF cards like SanDisk
-
Use a card reader to insert the TF card into your computer
-
Locate the downloaded Linux operating system image file archive ending with img.zip
-
The specific steps for flashing Linux image using balenaEtcher are as follows:
-
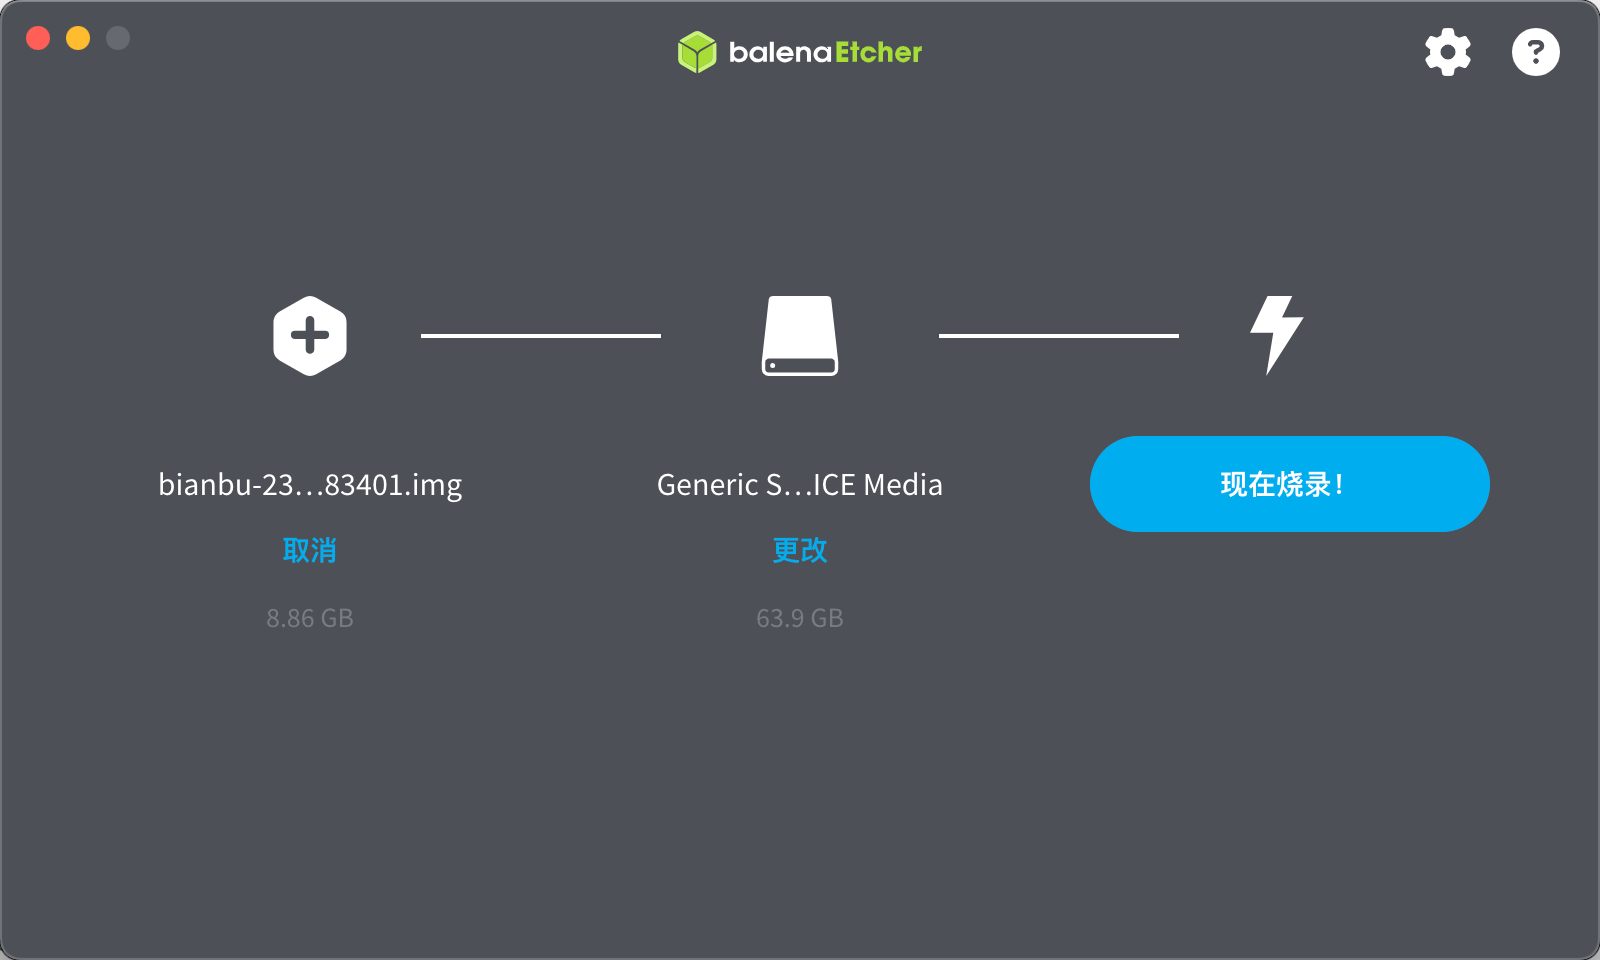
First select the path of the Linux image file to flash
-
Then select the TF card drive
-
Finally click Flash to start writing the Linux image to the TF card
-
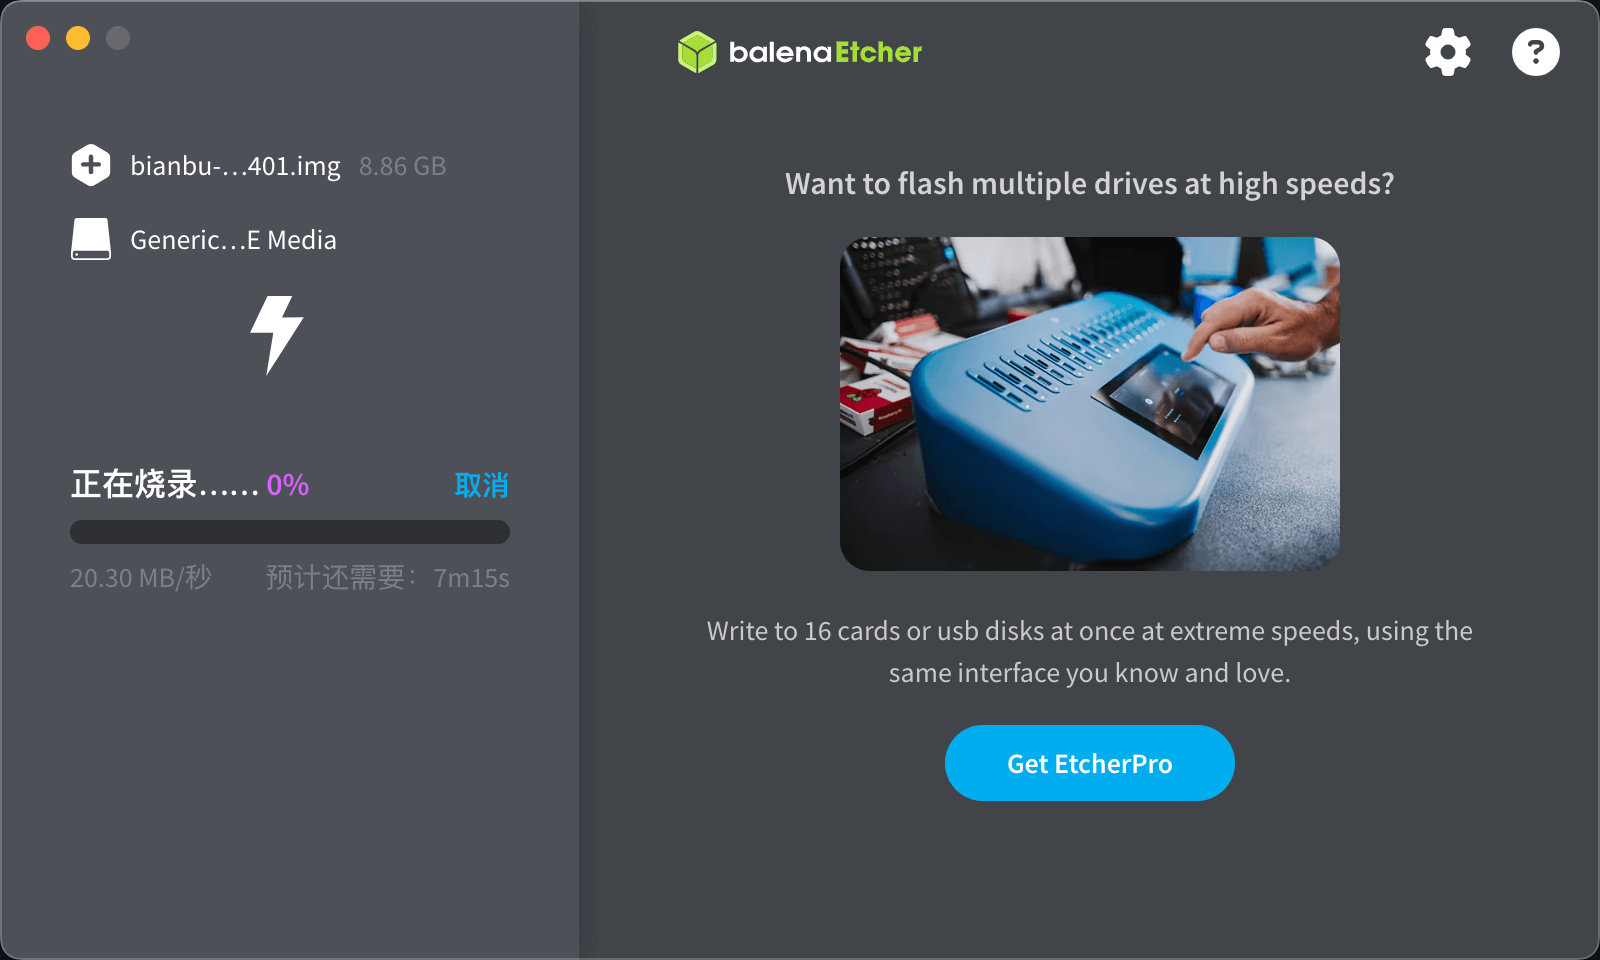
- The interface shown during balenaEtcher's flashing process is shown below. The purple progress bar indicates that the Linux image is being written to the TF card
- After flashing the Linux image, balenaEtcher will automatically verify the flashed image to ensure there were no problems during the process. As shown below, the green progress bar indicates that the image has been flashed and balenaEtcher is verifying it

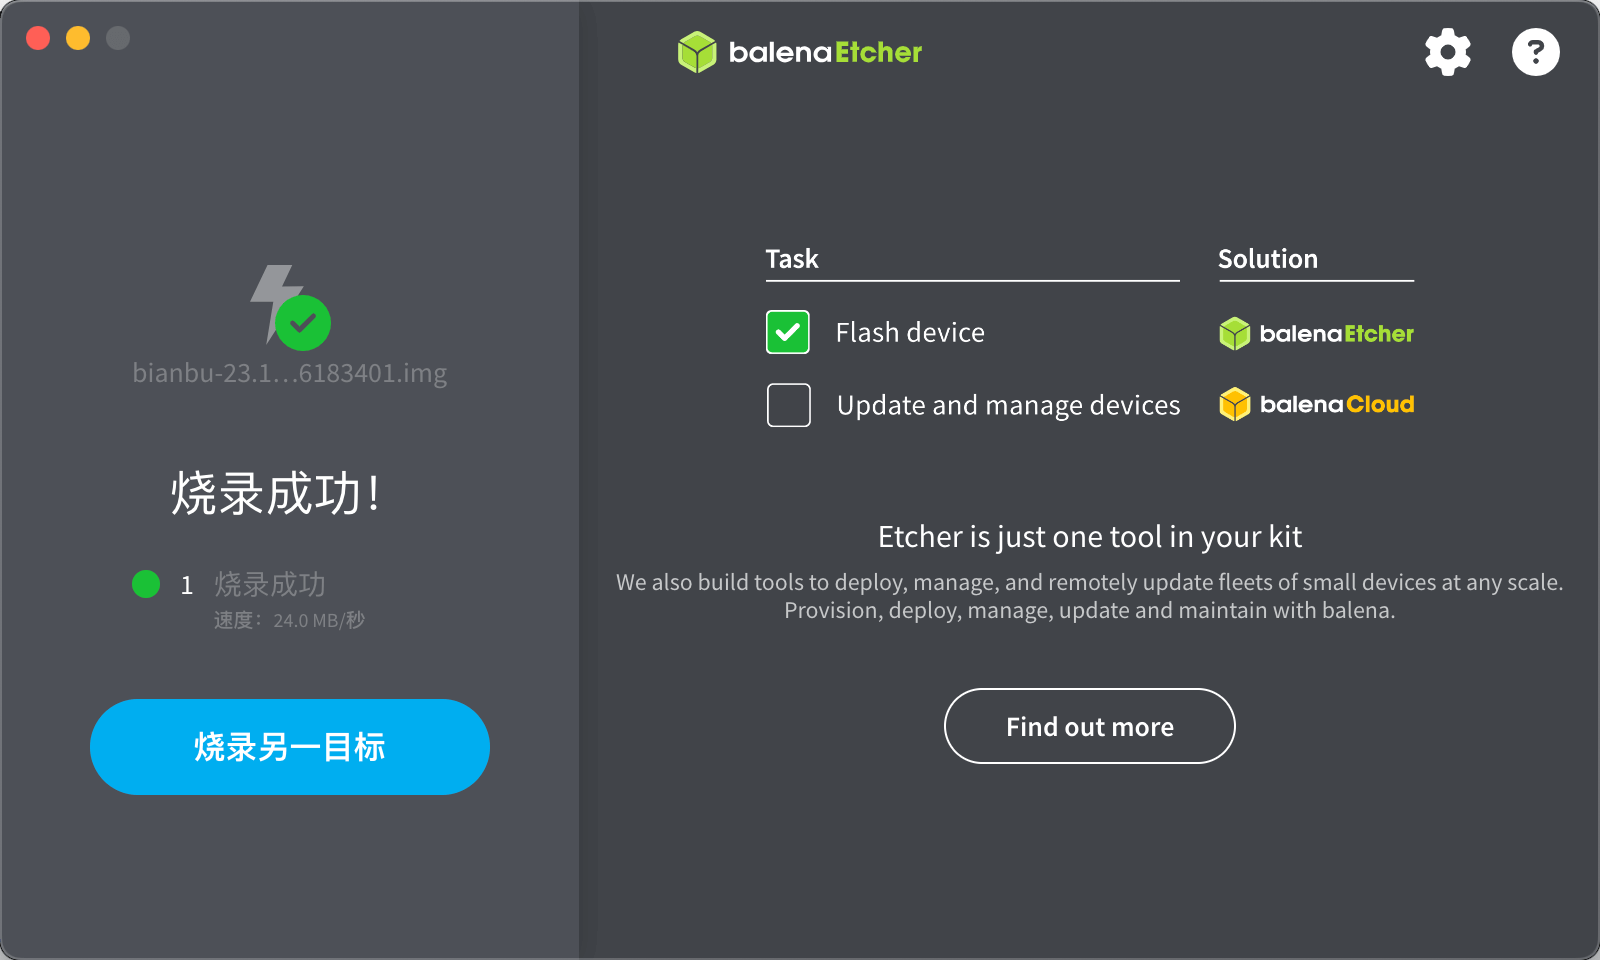
- The balenaEtcher interface after successful flashing is shown below. If you see a green indicator icon, it means the image was flashed successfully. You can now exit balenaEtcher, remove the TF card and insert it into the development board's TF card slot
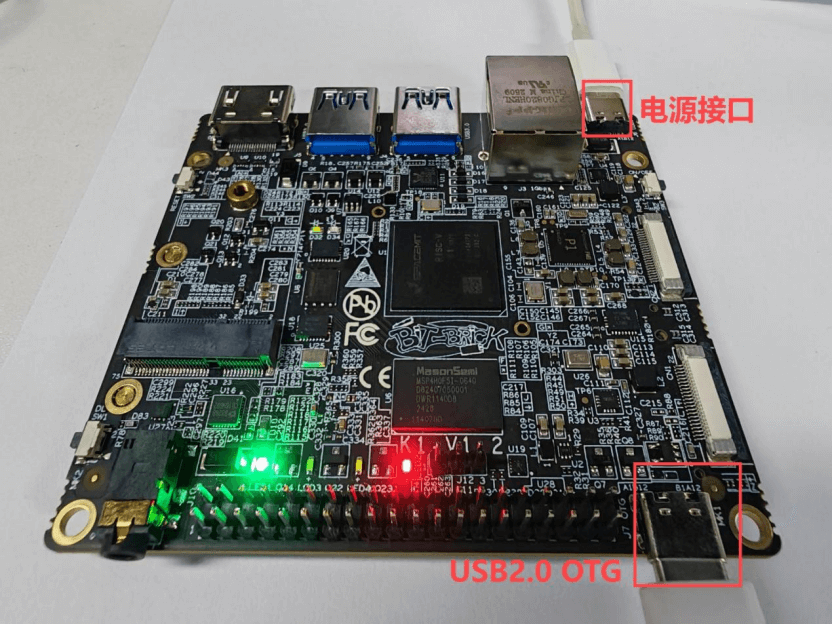
- Connect the K1 development board's USB2.0 OTG port to your computer, then connect the power supply
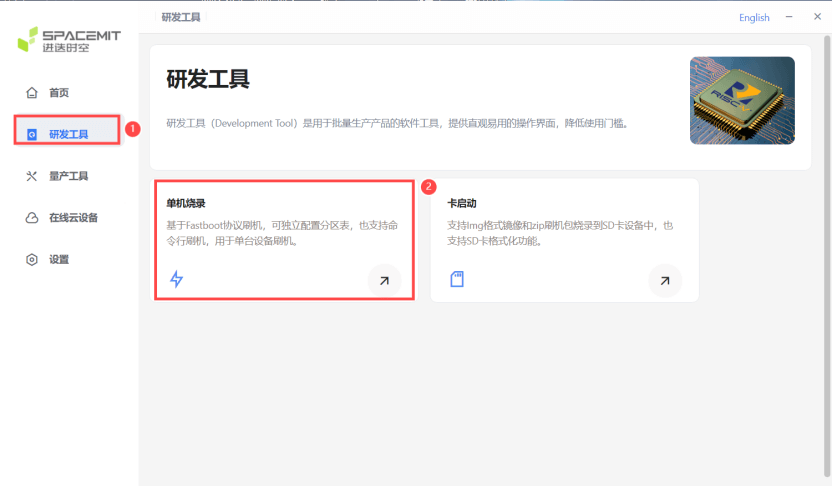
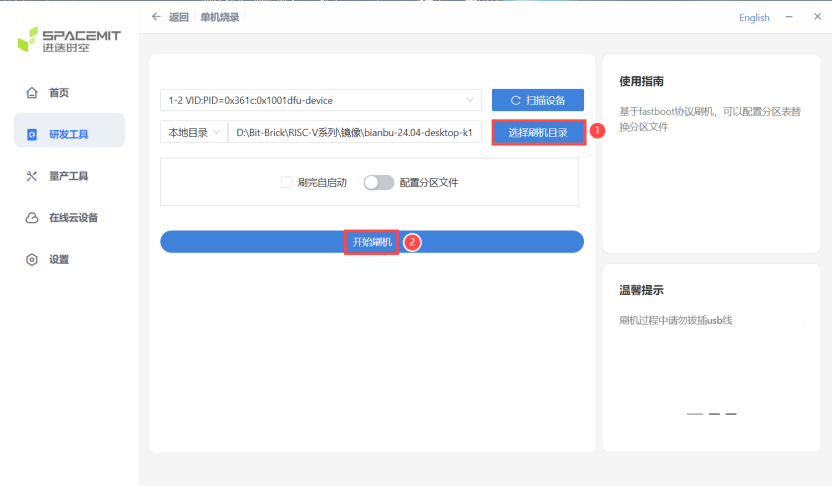
- Open the titanflasher tool, click on Developer Tools, then click to enter Single Machine Flash Mode
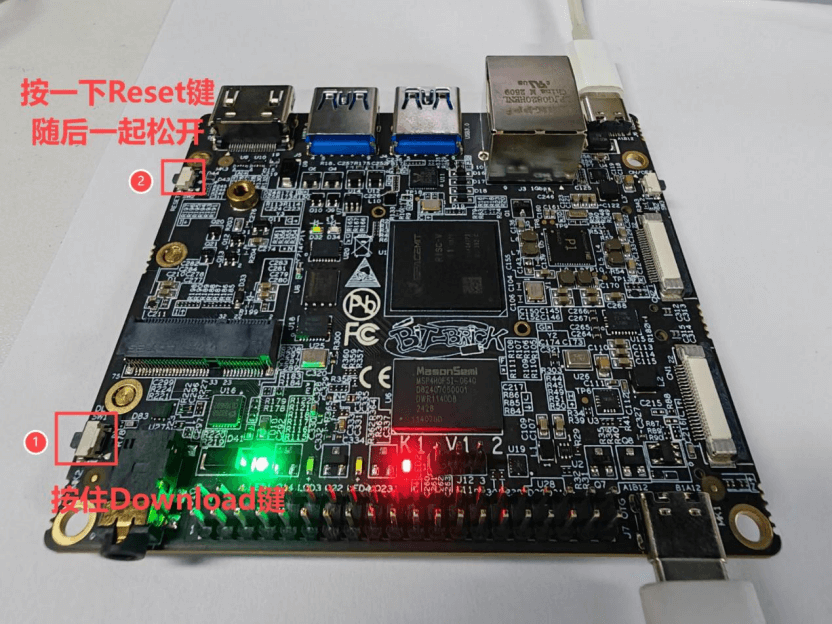
- Hold down the Download button on the K1 development board while pressing the Reset button once, then release both to enter flash mode
- Click Scan Device, and after the device is recognized, switch to pulling image from local directory
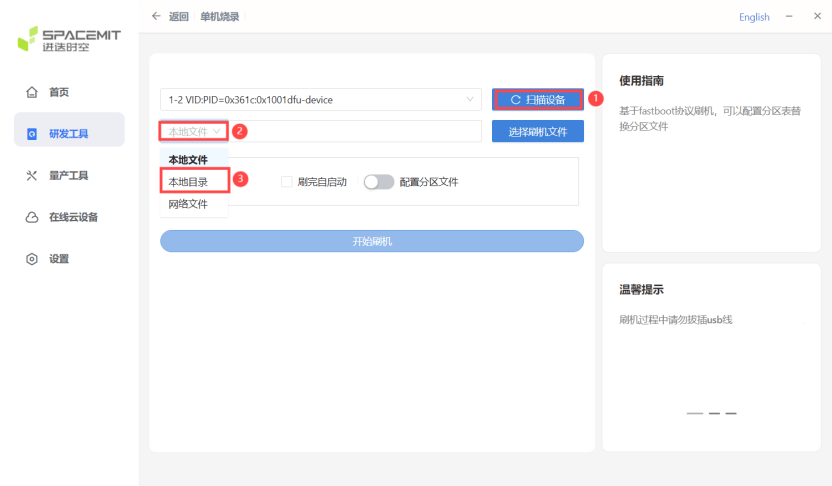
- Select the Bianbu image directory for eMMC flashing (need to extract the image archive first), click Start Flashing
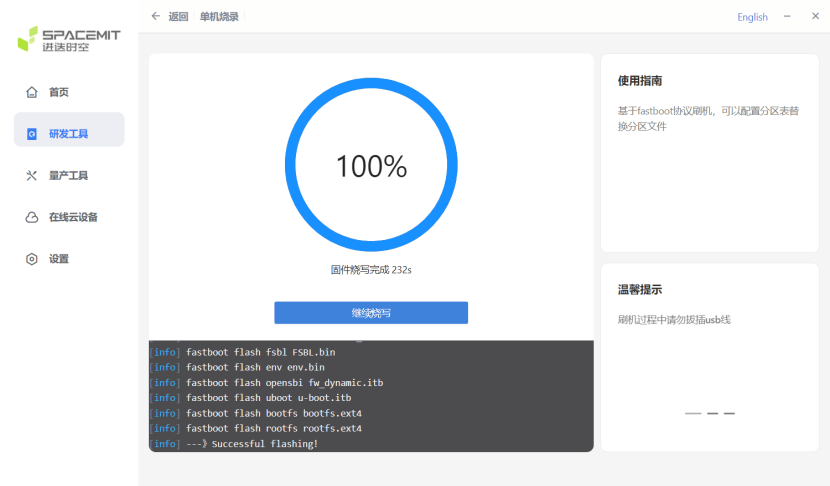
- Image flashing in progress
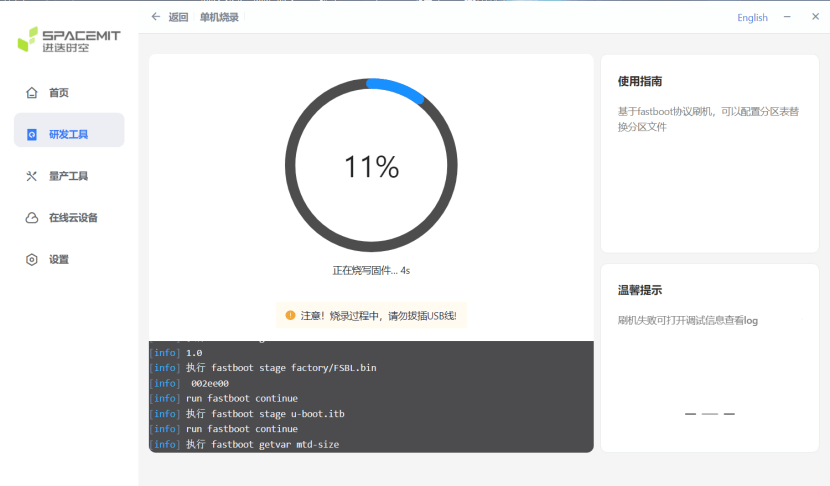
- Flashing complete, connect the peripherals and restart K1 or reconnect power to boot the system