Install an Operating System
Pi one Linux image download links:
yocto bsp
Method for Writing Linux Images to TF Cards Based on Windows PC
Using balenaEtcher to Write Linux Images
-
First, prepare a TF card with a capacity of 16GB or larger. The transfer speed of the TF card must be class 10 or above. It is recommended to use brands like SanDisk.
-
Then, use a card reader to insert the TF card into the computer.
-
Locate the downloaded Linux operating system image file package, then use decompression software to extract it. The file ending in ".wic" in the extracted files is the operating system image file, usually larger than 1GB.
-
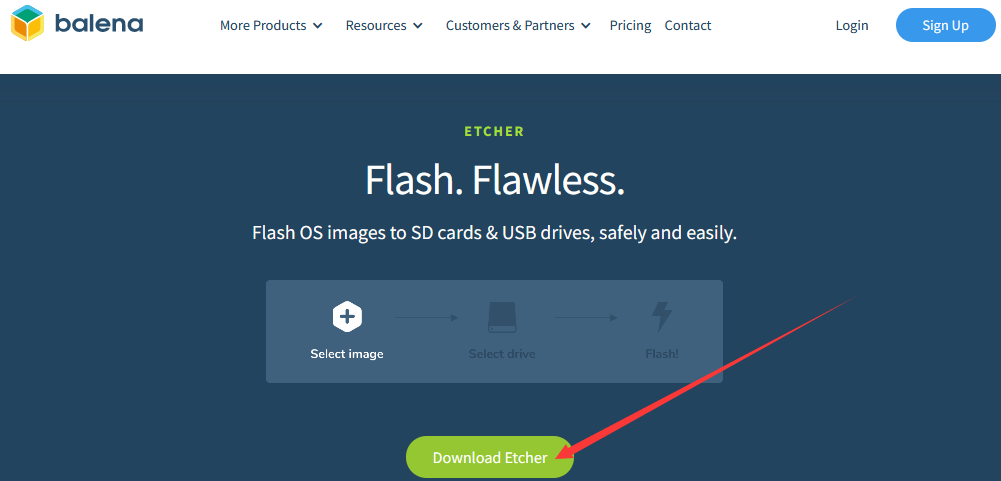
Next, download the Linux image writing software - balenaEtcher, available at https://www.balena.io/etcher/
-
On the balenaEtcher download page, click the green download button to proceed to the software download section.
-
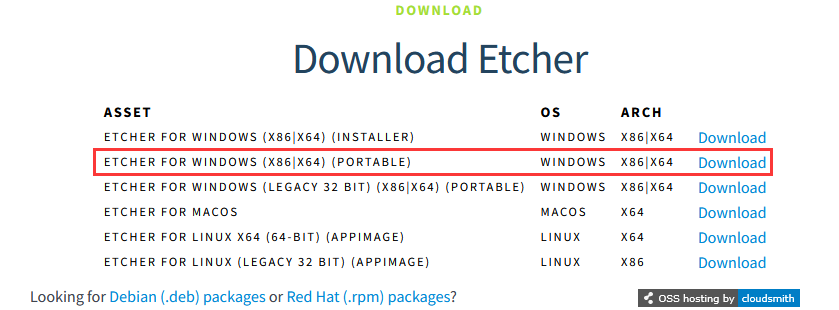
You can choose to download the portable version of balenaEtcher, which doesn't require installation and can be used by double-clicking to open it.
-
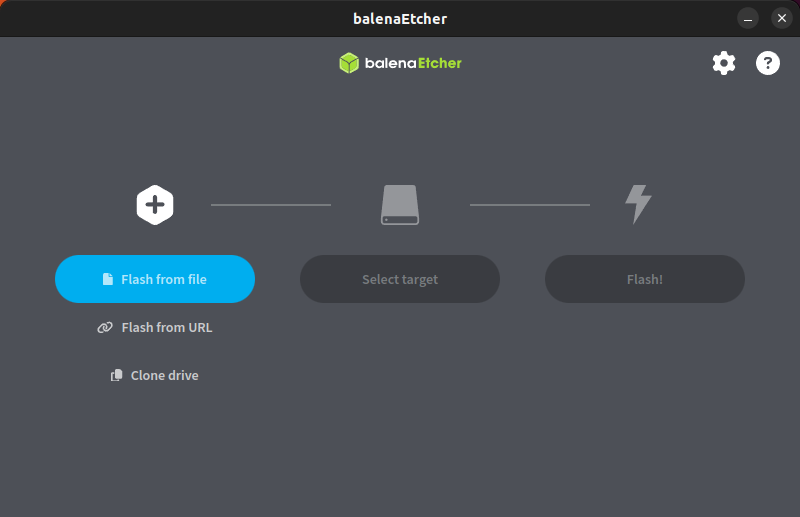
If you downloaded the installable version of balenaEtcher, install it first before using it. If you downloaded the portable version, simply double-click to open it. The interface of balenaEtcher after opening is shown below.
-
The specific steps to use balenaEtcher to write a Linux image are as follows:
-
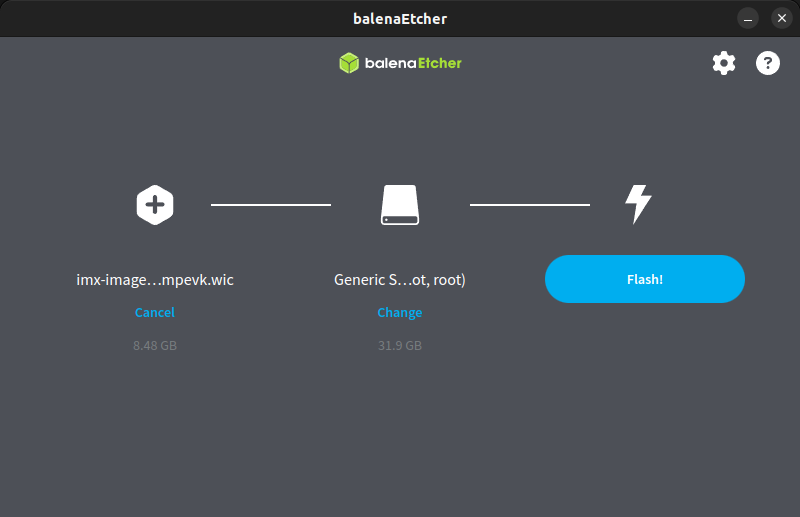
First, select the path of the Linux image file to be written.
-
Then, select the drive letter of the TF card.
-
Finally, click Flash to start writing the Linux image to the TF card.
-
-
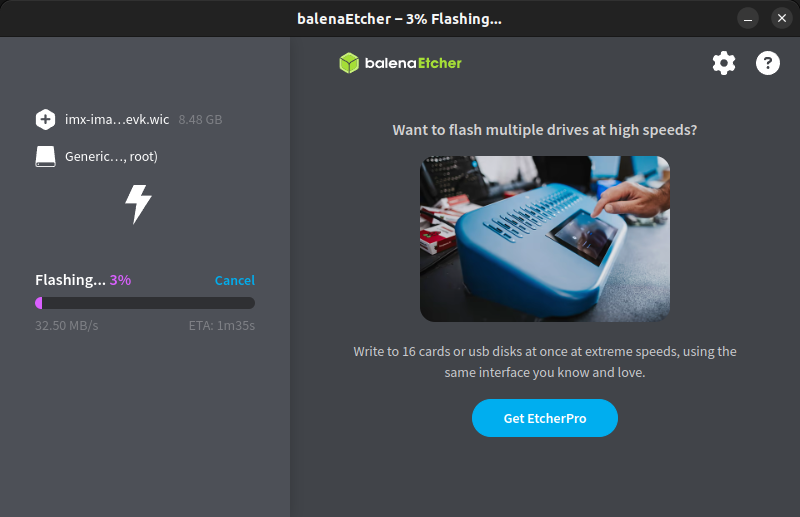
The interface displayed during the process of balenaEtcher writing the Linux image is shown below. The purple progress bar indicates that the Linux image is being written to the TF card.
-
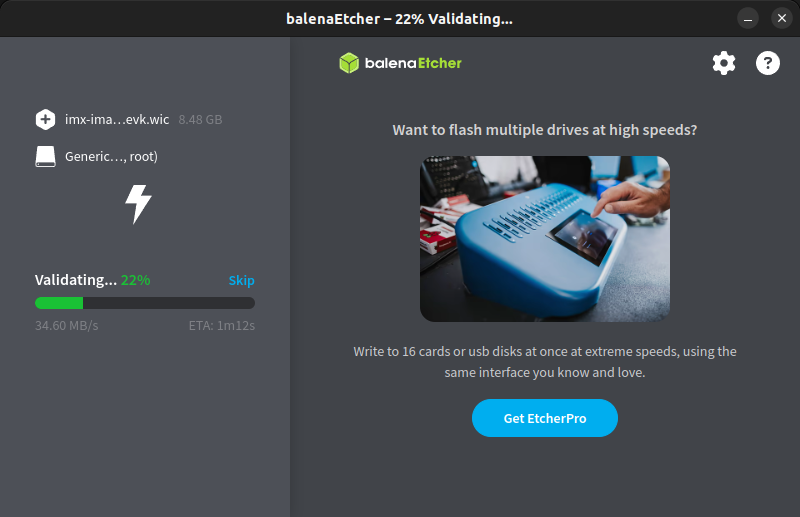
After writing the Linux image, balenaEtcher will, by default, verify the image written to the TF card to ensure there were no issues during the process. As shown below, a green progress bar indicates that the image has been written, and balenaEtcher is verifying the written image.
-
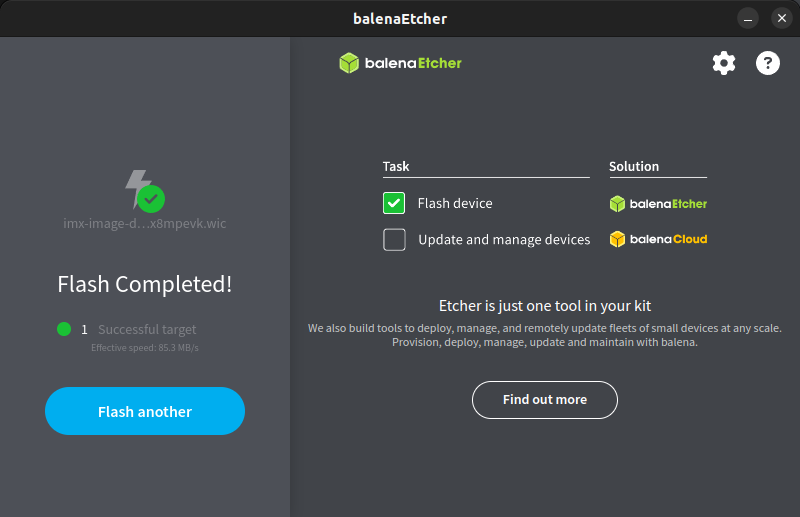
After successfully writing, the display interface of balenaEtcher is shown below. If a green indicator icon is displayed, it means the image writing was successful. You can now exit balenaEtcher and insert the TF card into the TF card slot of the development board for use.
Method for Writing Linux Images to TF Cards Based on Ubuntu
Using balenaEtcher to Write Linux Images
-
First, prepare a TF card with a capacity of 16GB or larger. The transfer speed of the TF card must be class 10 or above. It is recommended to use brands like SanDisk.
-
Then, use a card reader to insert the TF card into the computer.
-
Locate the downloaded Linux operating system image file package, then use the following command. The file ending in ".wic" in the extracted files is the operating system image file, usually larger than 1GB.
$ zstd -d imx-image-desktop.rootfs.wic.zst -
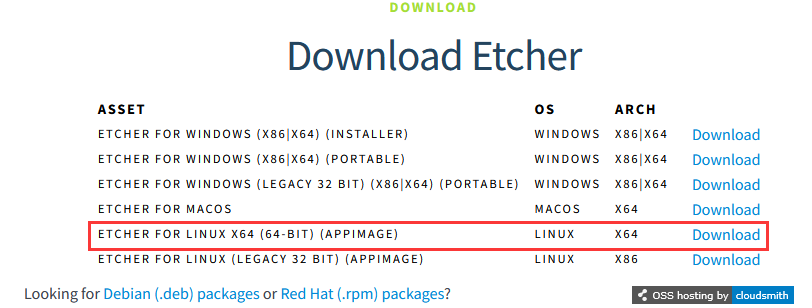
Next, download the Linux image writing software - balenaEtcher, available at https://www.balena.io/etcher/
-
On the balenaEtcher download page, click the green download button to proceed to the software download section.
-
You can choose to download the portable version of balenaEtcher, which doesn't require installation and can be used by double-clicking to open it.
-
Then, double-click balenaEtcher-1.14.3-x64.AppImage on the Ubuntu PC graphical interface to open balenaEtcher (no installation required). The interface of balenaEtcher after opening is shown below.
-
The specific steps to use balenaEtcher to write a Linux image are as follows:
-
First, select the path of the Linux image file to be written.
-
Then, select the drive letter of the TF card.
-
Finally, click Flash to start writing the Linux image to the TF card.
-
-
The interface displayed during the process of balenaEtcher writing the Linux image is shown below. The purple progress bar indicates that the Linux image is being written to the TF card.
-
After writing the Linux image, balenaEtcher will, by default, verify the image written to the TF card to ensure there were no issues during the process. As shown below, a green progress bar indicates that the image has been written, and balenaEtcher is verifying the written image.
-
After successfully writing, the display interface of balenaEtcher is shown below. If a green indicator icon is displayed, it means the image writing was successful. You can now exit balenaEtcher and insert the TF card into the TF card slot of the development board for use.